Phantom Blade Zero HDR Settings: PC Calibration Guide
Set up Phantom Blade Zero HDR on PC, from NVIDIA output and Windows color profiles to HDR calibration, Peak Brightness, Mid Brightness and UI.
In this article
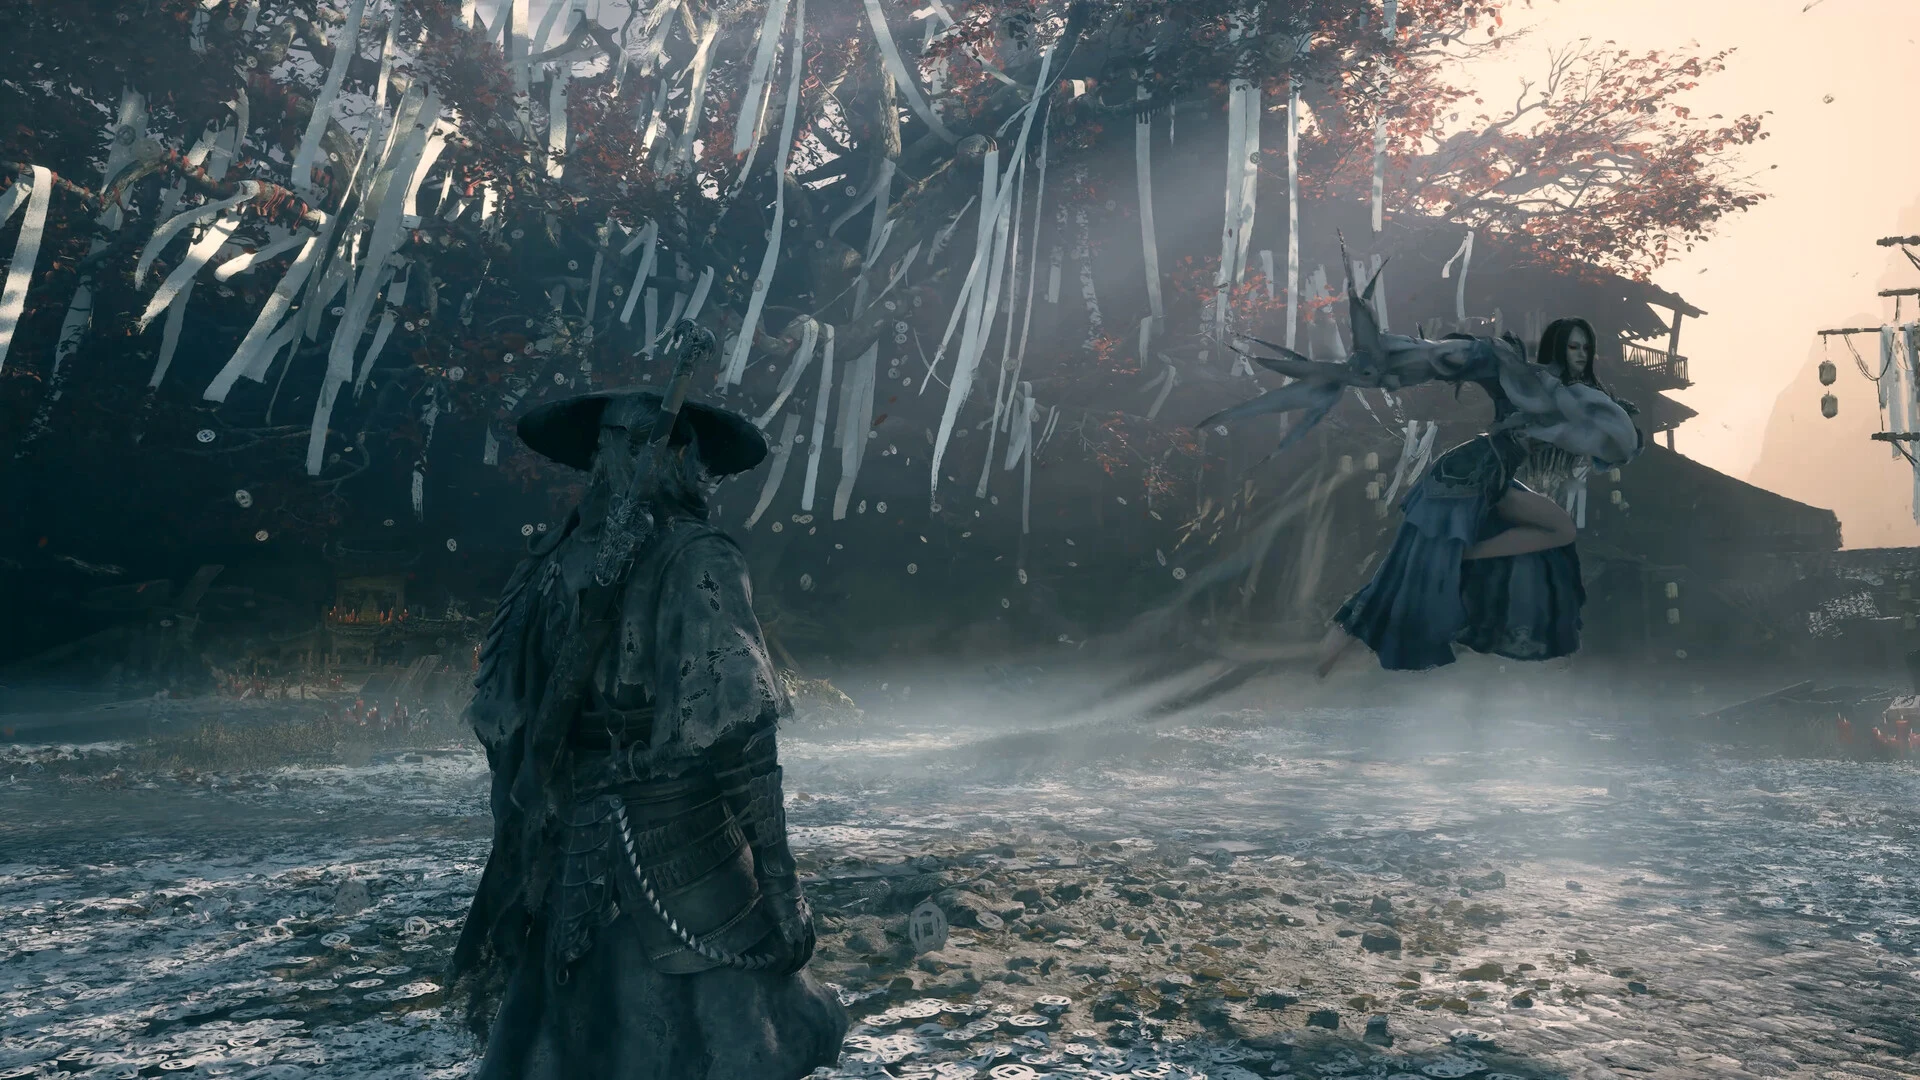
For Phantom Blade Zero, get the display and Windows setup right before touching the game’s brightness sliders. Choose the monitor mode, check the GPU signal, sort out your color profile, then run Windows HDR Calibration. In the game, adjust HDR Peak Brightness first, Mid Brightness second, and UI Brightness last.
There are two separate choices along the way: how you want the SDR desktop to look, and how you set up HDR for the game. I’ll cover both in order. If your desktop is already how you like it, you can leave its SDR settings alone and move straight to the Windows HDR calibration section.
1. Start with the right display and monitor mode
Open Windows Settings → System → Display and select the monitor you’ll play on. With two screens attached, check that selection before changing a profile or enabling HDR. A correct setting assigned to the other screen won’t help this one.
Open the monitor’s on-screen display, or OSD, using its joystick or buttons. Find its picture-mode, color-space and HDR options. The names vary, so use the manual for your exact display to identify what each mode changes.
Color space and gamma: separate SDR from HDR
For the SDR desktop, an sRGB mode can be a useful starting point when you want ordinary content to stay within sRGB. If you’re using the display’s wider gamut, keep the profile and color-management setup aligned with that mode. Don’t select DCI-P3 simply because the specifications advertise P3 coverage: a coverage claim doesn’t tell you which OSD preset to use.
Gamma 2.2 is a reasonable SDR starting point. The label is still a setting, not a measurement of your particular screen. Changing an ICC profile’s gamma value just to match that label doesn’t calibrate the monitor.
HDR10 uses PQ, a different brightness response. When you turn HDR on later, the monitor may lock gamma and color-space controls or handle them inside its HDR mode. Let that mode do its job. There is no need to switch back to SDR just to unlock gamma 2.2.
If several HDR modes are available, choose the one you intend to play with before calibration. Keep its brightness processing consistent afterward. A profile made with one HDR mode is a poor starting point after changing to another mode with different output.
OLED pixels emit their own light, but owning an OLED still doesn’t give you one universal brightness setting. Use the active HDR mode’s behavior and the calibration patterns on your screen rather than copying another panel’s values.
2. Check NVIDIA output color settings
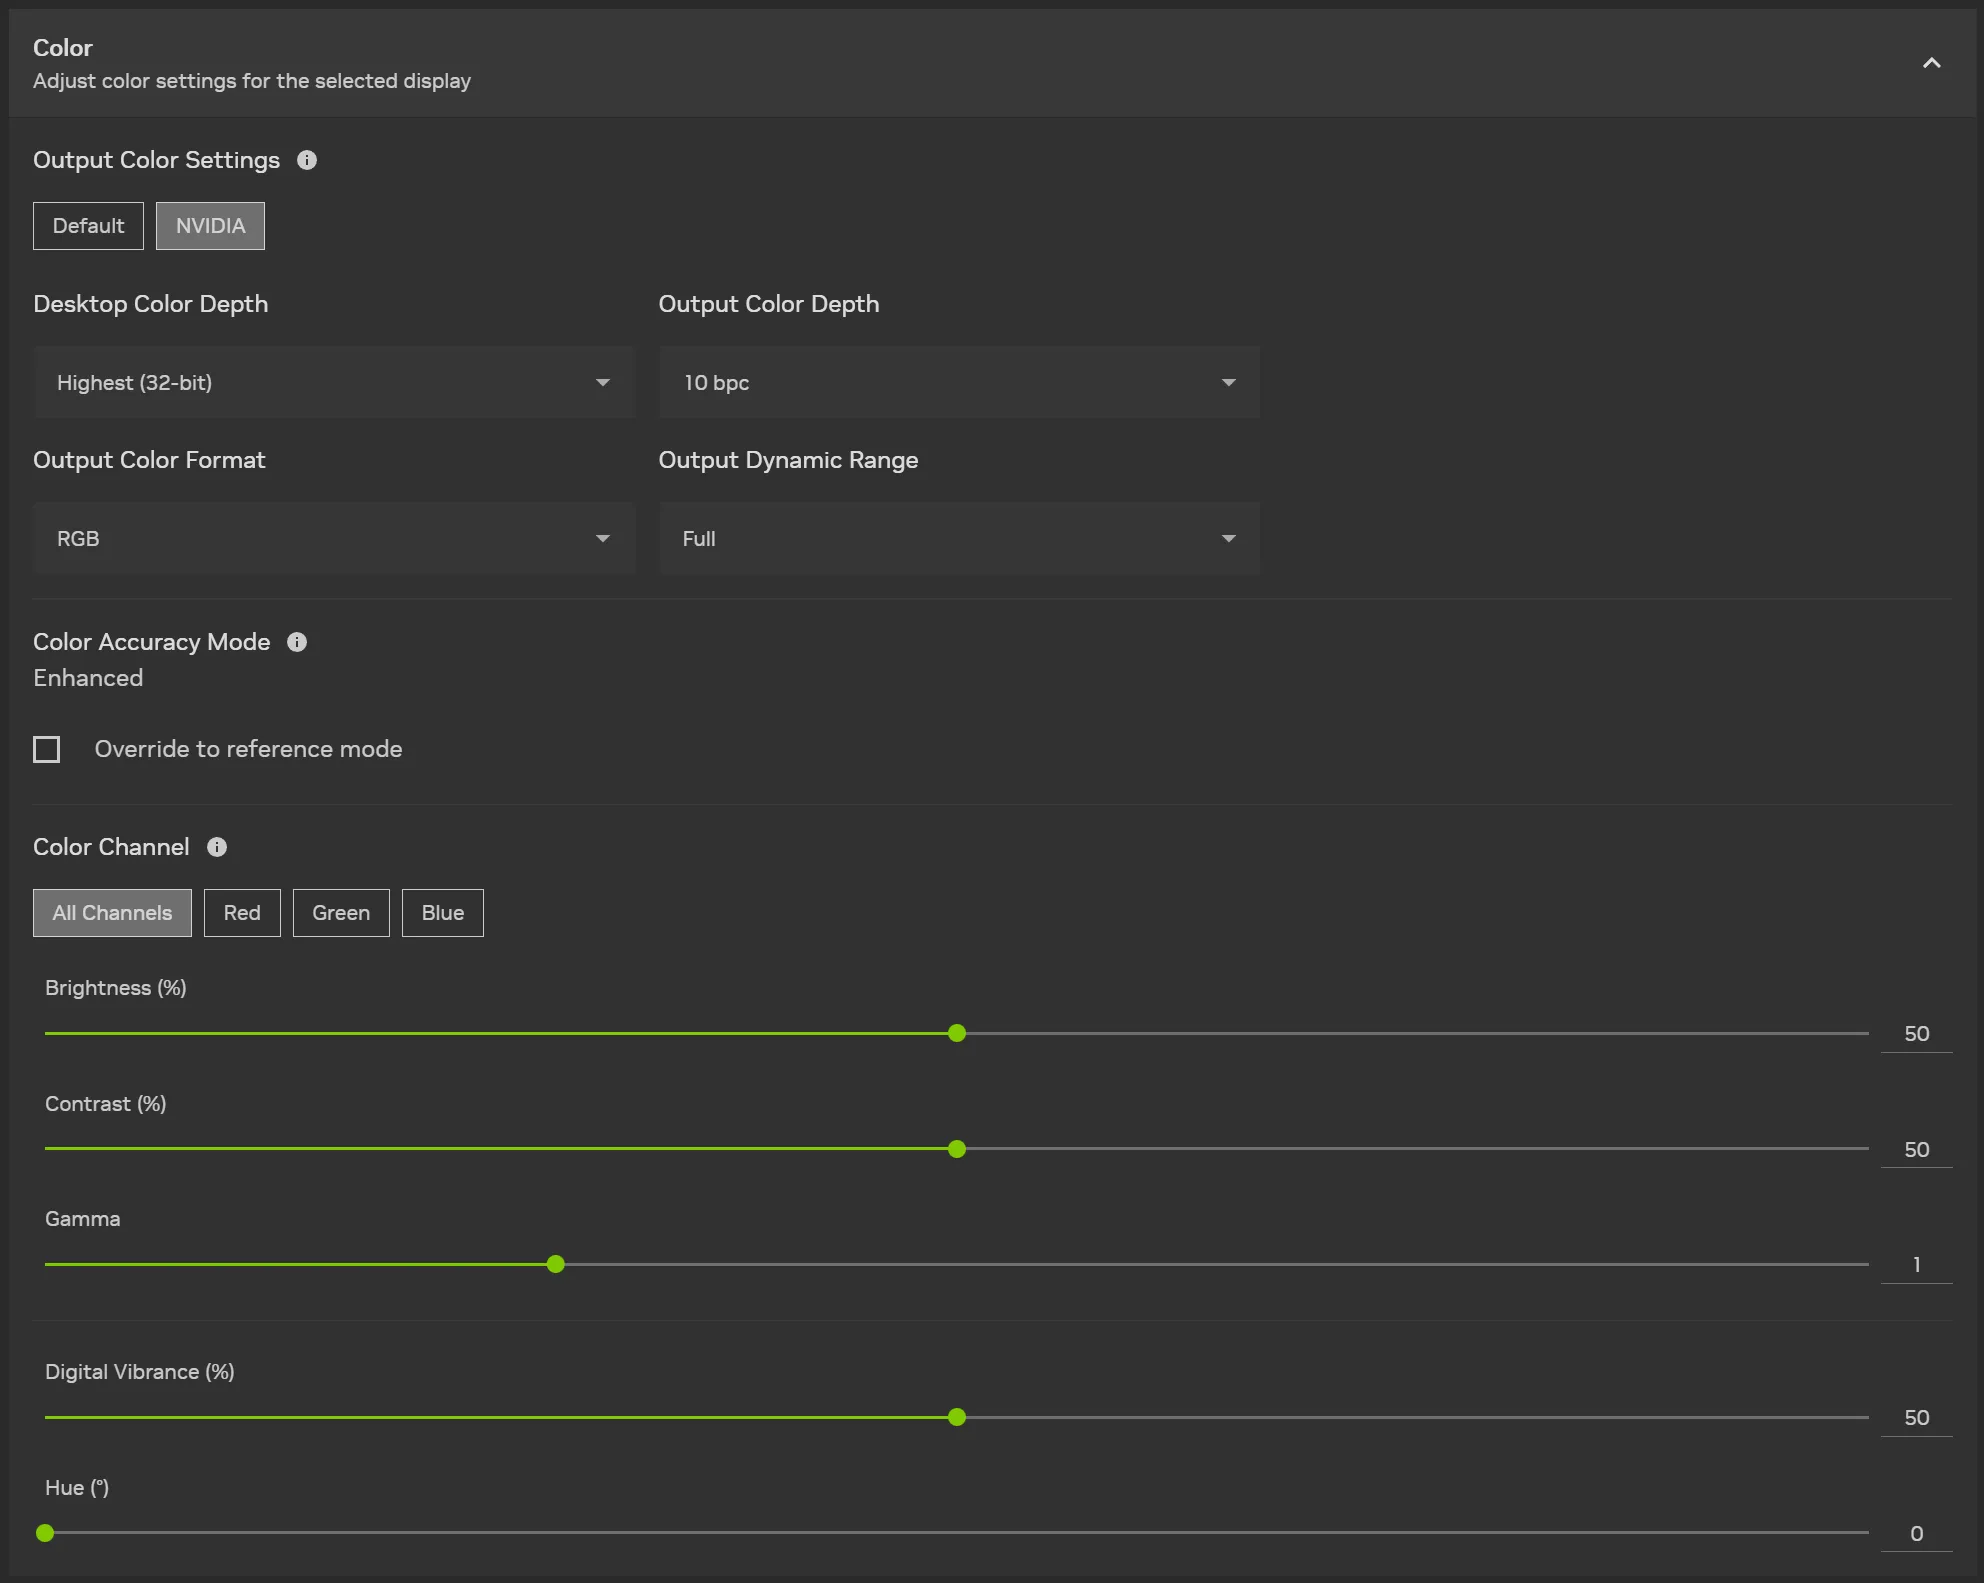
In the NVIDIA App → System → Displays, select the gaming display and find Color → Output Color Settings. Choose the NVIDIA controls if you need to set these values manually. In NVIDIA Control Panel, the corresponding options are under Display → Change resolution.
Keep the monitor’s native resolution and your intended refresh rate, then check these settings:
| NVIDIA setting | Starting point |
|---|---|
| Desktop Color Depth | Highest (32-bit) |
| Output Color Format | RGB |
| Output Dynamic Range | Full, when the monitor input supports full-range RGB |
| Output Color Depth | 10 bpc for HDR when available at your chosen resolution and refresh rate |
The two depth settings mean different things. Highest (32-bit) is the desktop setting; 10 bpc means ten bits per color channel in the output signal. A 32-bit desktop selection does not mean your monitor receives 32 bits per channel.
If a higher output depth is available without compromising the signal configuration you want, you can use it. I wouldn’t sacrifice the desired refresh rate just to select the largest number. Check the display, connection and bandwidth limits if 10 bpc is missing.
Full range also needs agreement at both ends. If a TV or monitor has a manual input-range option, match it to the GPU. Fix an incorrect range before trying to compensate with Phantom Blade Zero’s brightness controls.
3. Set the SDR profile and choose how you want colors to look
This section concerns the desktop while HDR is off. It is useful for understanding the browser color checks and for getting everyday apps how you like them. Windows HDR has its own color-management behavior, which we’ll set up next.
Get the right ICC profile
An ICC profile describes color characteristics for a device or color space. A display profile helps color-managed software interpret your monitor. Assigning one in Windows doesn’t change the monitor’s physical OSD mode, so those two parts need to agree.
Start at the manufacturer’s support page for your exact monitor. Look for its monitor driver or ICC/ICM profile and follow any accompanying instructions. Check which picture mode it describes before using it. A profile intended for the display’s native gamut should not be assumed correct after applying a different OSD clamp.
If the vendor doesn’t provide a usable profile, these sites can help:
- TFTCentral’s profile database (opens in a new tab) offers SDR profiles and associated settings for supported models. Access currently requires membership. Match the listed model, revision and OSD setup.
- PC Monitors’ ICC guide (opens in a new tab) explains installation and links profile use to the relevant reviews. Profiles are available selectively, rather than for every monitor.
- RTINGS’ calibration guide (opens in a new tab) is useful for understanding settings and measurements. RTINGS explicitly advises against copying its calibration profiles between units.
A downloaded review profile is an optional SDR experiment. Keep your previous profile so you can return to it if the result is worse. Even two units of the same model can differ; a file made from someone else’s measurements doesn’t measure yours.
Assign it to the correct screen
Go to Settings → System → Display → Color profile/Color management. Select the intended display, use Add profile to associate the file, then set it as that display’s profile. Windows labels can differ by release.
Check each connected screen separately. Don’t give the secondary monitor the gaming monitor’s profile merely because the file is installed. Also, SDR Profile doesn’t mean “sRGB-only”: an SDR profile can describe a wide-gamut display. SDR/HDR and sRGB/P3 describe different aspects of the picture.
Auto Color Management: accuracy or the more vivid desktop?
Automatically manage color for apps, often shortened to ACM, is the SDR choice on this page. With it enabled, Windows aims to keep colors consistent across apps. Ordinary sRGB content should retain its intended saturation on a wide-gamut screen instead of expanding to the panel’s most saturated colors.
There is an awkward compatibility case. Some older ICC-aware apps receive an sRGB profile under ACM, limiting the colors they output even though the monitor supports more. This doesn’t affect every browser or game. A correctly assigned monitor profile can still be present while an affected app sees sRGB.
I prefer ACM off for my SDR desktop. I like the stronger color and don’t want to configure compatibility options for individual apps. If that sounds like your priority too, I’d try it off. The tradeoff is that unmanaged sRGB content can look oversaturated or inaccurate. Managed apps still need the right profile, and turning ACM off doesn’t give every app accurate P3 output.
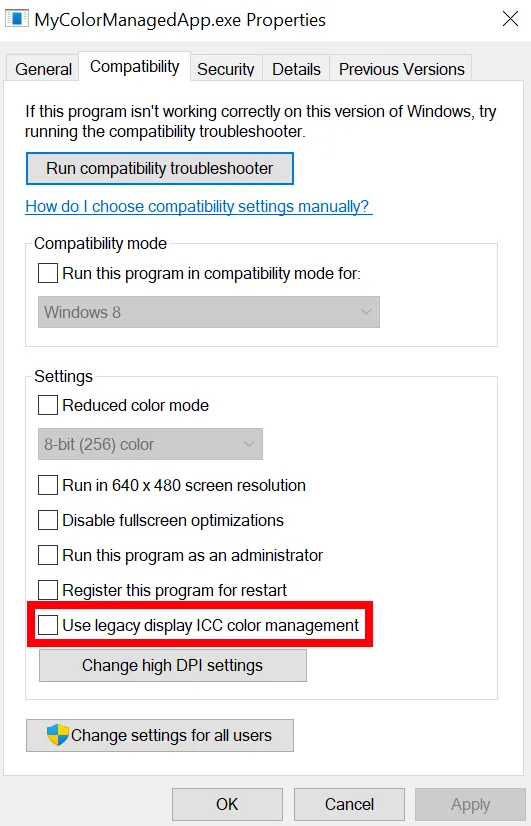
If faithful color is your priority, keep ACM on. For an affected older color-managed app, try Properties → Compatibility → Use legacy display ICC color management, then fully reopen the app. The helper applies to the whole process, including its interface; it isn’t a checkbox to enable for every game.
Where to find the legacy ICC option
Once you enable HDR, Windows already manages display color. Turning the SDR ACM switch off is not an HDR calibration step. Keep the desktop preference and the game’s HDR setup separate.
Check the browser before blaming the game
Use the color comparisons on the screen you’ll play on. A visible difference between sRGB and Display P3 patches can help you notice how this browser is presenting color. It doesn’t measure the monitor’s gamut coverage or certify its calibration. Gamut mapping and unmanaged rendering can also preserve a difference.
Can you see the Hone logo?
Move this window onto your gaming monitor first. Look inside the orange patch, then compare the colors where the two rows meet.



I can see the logo or a difference between rows
This image path preserves a color difference. Compare on your gaming display after choosing its intended mode. Gamut mapping and unmanaged rendering can preserve differences too, so this does not measure the panel's gamut or confirm accurate color.
The logo disappears and the rows look alike
Check that this window is on your gaming monitor. Check its sRGB preset or clamp and try a current color-managed browser. In SDR, an affected older ICC-aware app may also need the ACM compatibility option described above. Red and green are the useful comparisons; the two spaces share a blue primary.
These check color differences, not HDR brightness. If a patch is missing, reload the page before interpreting the result.
For the profile comparison, the two solid green halves represent the same intended color in different image profiles. They should look very similar when the browser interprets both correctly. If there is a clear seam, try another current browser before changing game brightness. Matching halves check image interpretation; they don’t prove that the Windows display profile is correct.
Do the green halves match?
Look for a seam in the middle. Both images describe the same intended green.


The halves look the same
These two images appear consistent in this browser. That is the expected result. It does not validate your Windows display profile or measure monitor accuracy.
I can see a clear color difference
Open this page in another current browser on the same screen. If the difference changes, check browser color handling before using web images to judge color. Keep the display profile matched to your monitor and its active setup.
If either half is missing, reload the page. A missing image is not a color result.
4. Enable HDR and run Windows HDR Calibration
Return to Settings → System → Display → HDR, select the gaming monitor and turn HDR on. Choose the monitor’s intended HDR OSD mode now if it only becomes available after receiving an HDR signal. Keep that mode selected through calibration and play.
On Windows 11, install Microsoft’s Windows HDR Calibration app (opens in a new tab). Run it on that display, full screen, in the room lighting you normally use.
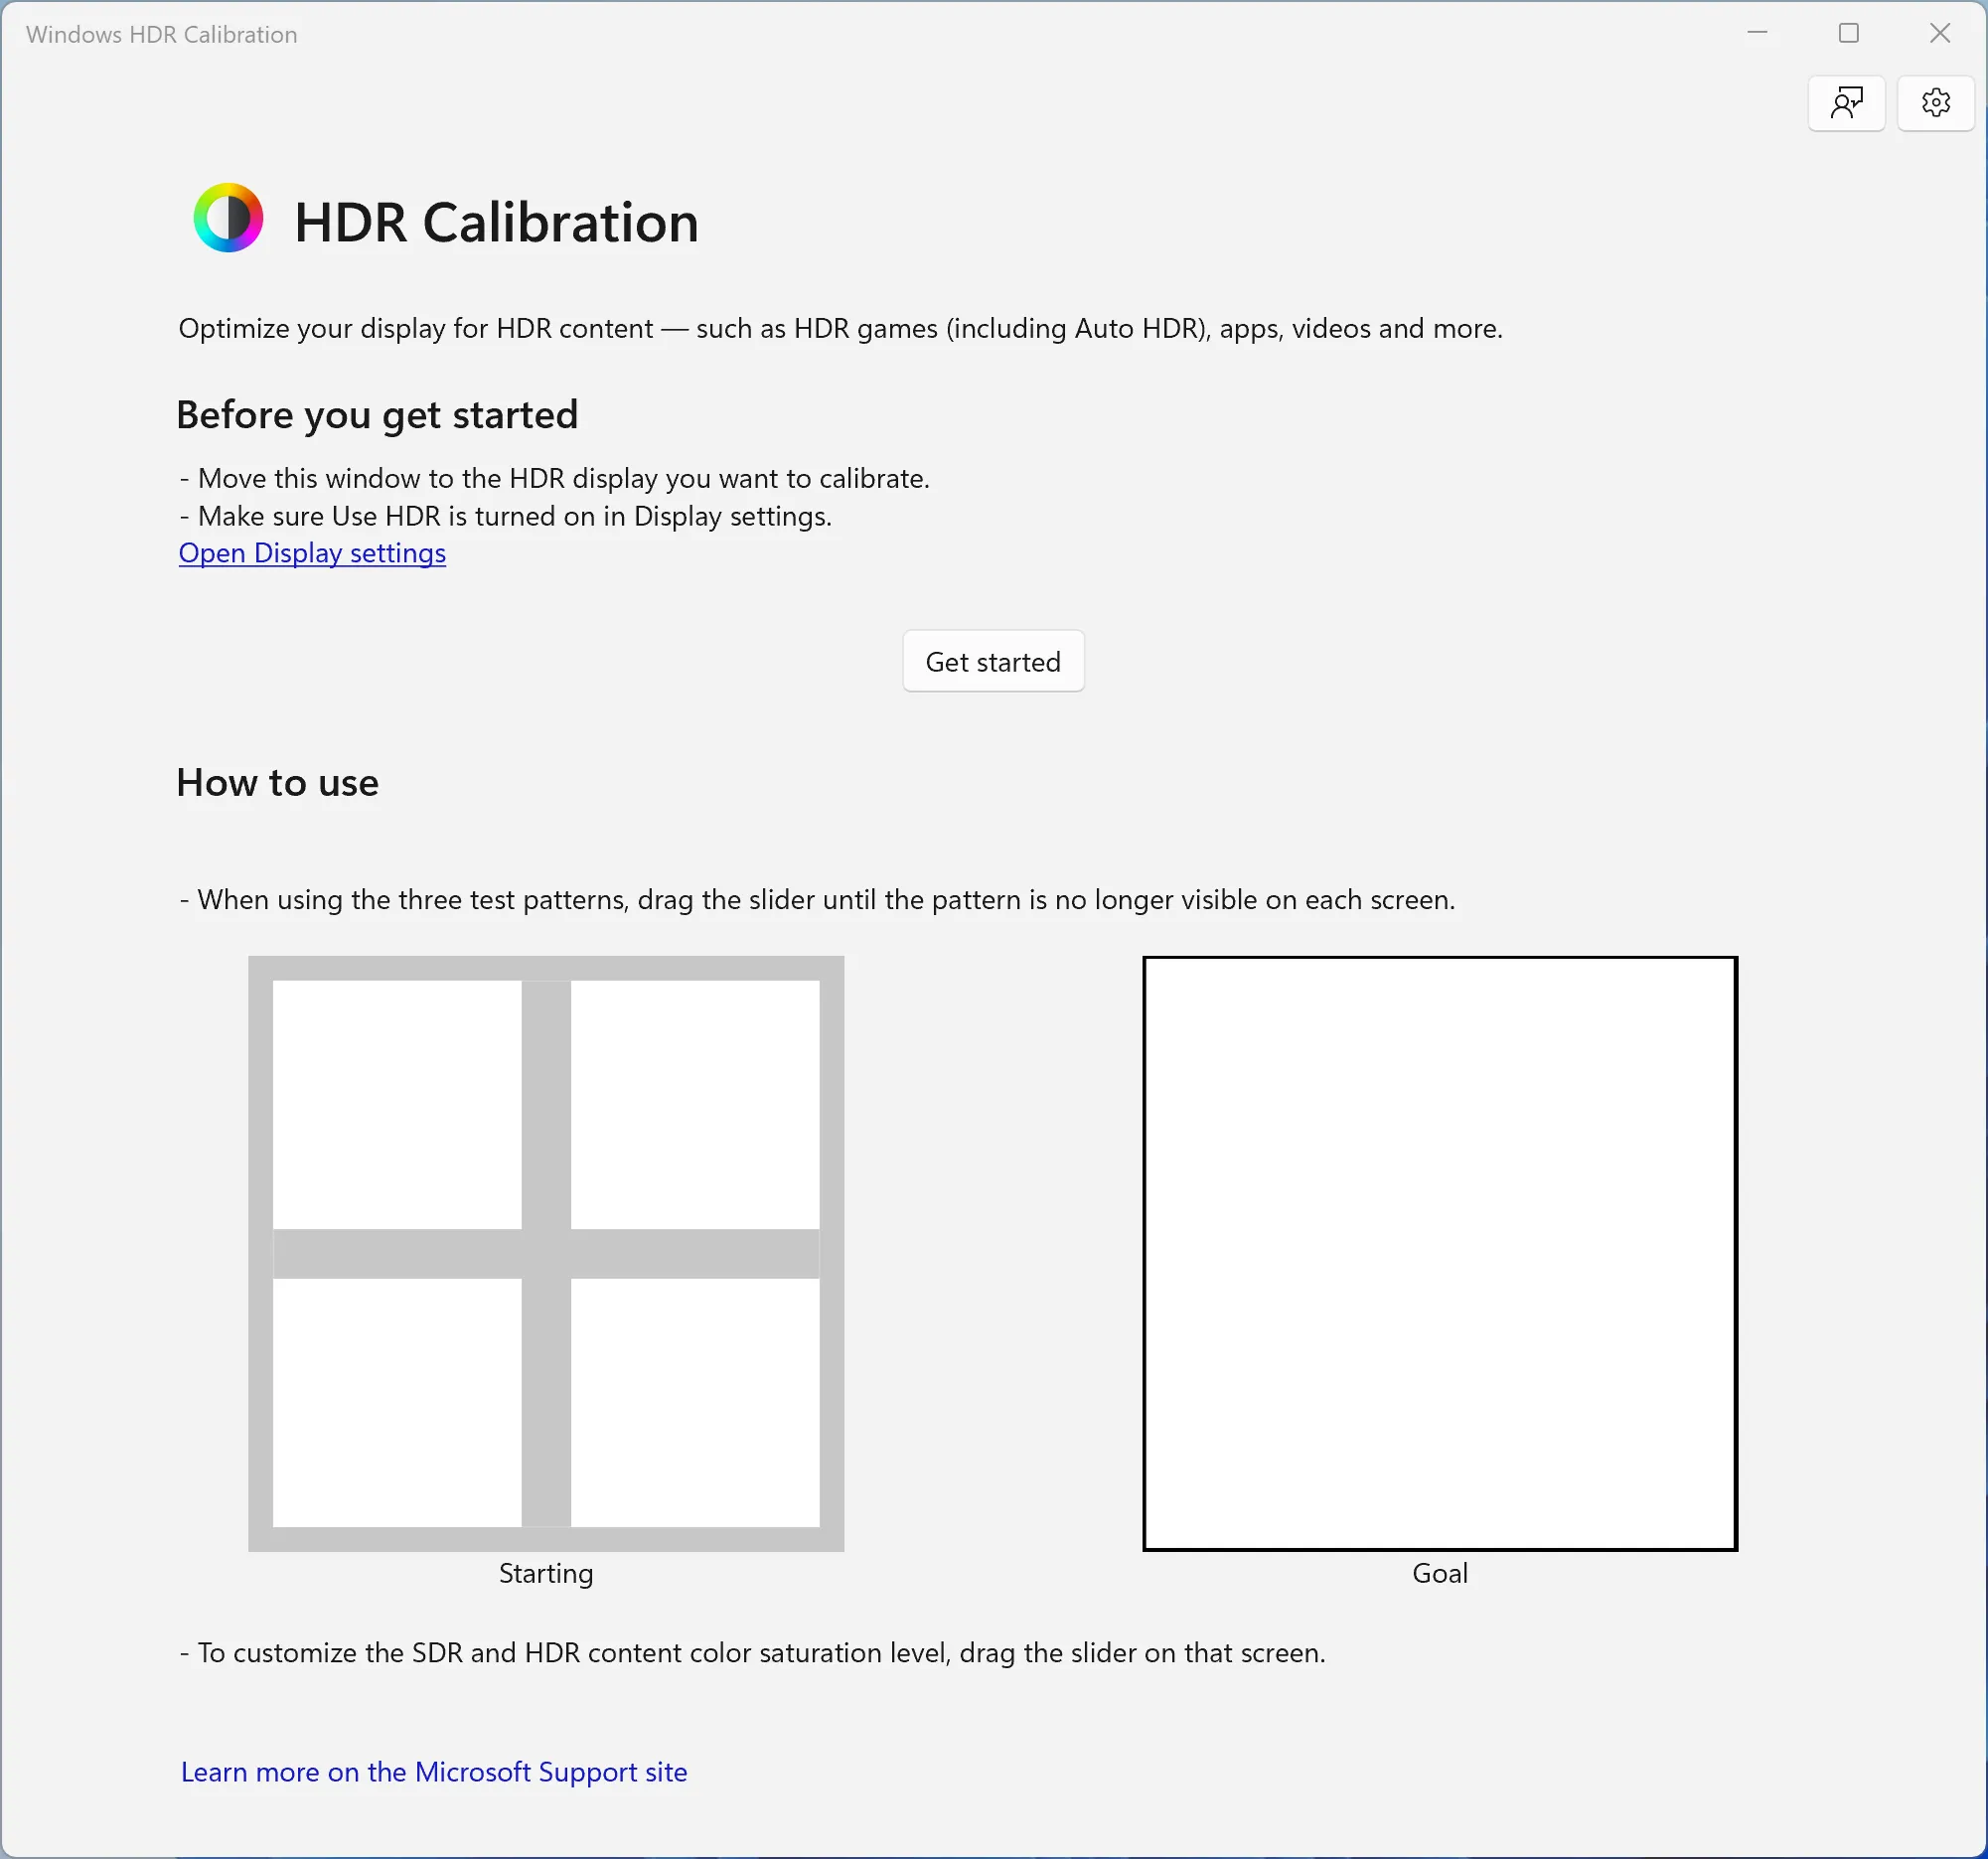
- Follow the dark, bright and full-frame test patterns. Move each slider until its pattern is no longer visible, as the app instructs.
- Start with the saturation control at its default. Extra saturation is a preference adjustment and can make colors look unnatural.
- Save the result with a recognizable name and check that the calibration profile belongs to the intended display.
If processing interferes with the patterns, consult the monitor’s HDR-mode instructions. Keep the intended HDR configuration consistent rather than disabling every display feature. Repeat calibration after changes that materially alter HDR output.
This HDR profile has a different role from the ordinary SDR profile discussed above. Windows can use its brightness information, but we haven’t verified that Phantom Blade Zero automatically adopts it for its own controls. Finish the setup in the game.
If the SDR desktop is uncomfortable while HDR is enabled on an external monitor, adjust SDR content brightness in Windows HDR settings. It changes SDR content relative to HDR. It won’t replace the game’s Peak Brightness control.
5. Set Phantom Blade Zero’s Peak, Mid and UI Brightness
Open Phantom Blade Zero’s HDR Calibration screen. Work through its controls in this order:
| Game setting | What to do |
|---|---|
| HDR Peak Brightness | Use the display’s peak capability in its active HDR mode as a starting target. Judge highlight detail afterward; the number on the slider is not a measurement of your screen. |
| HDR Mid Brightness | Start at the current value, then adjust the overall scene brightness. Keep useful detail visible without lifting every shadow. |
| HDR UI Brightness | Set text and interface brightness to a comfortable level after the scene looks right. |
Set Peak first because these controls aren’t completely independent. HDRgameAnalysis reports that increasing Peak can also raise the game’s paper-white level with Mid unchanged. In practical terms, recheck Mid after changing Peak instead of assuming the scene will stay equally bright. That analysis is useful context, not a universal preset for every display or game build.
Look in the monitor’s manual or a measured review of its HDR modes for peak-output information. Use the information for your monitor’s active HDR mode, rather than copying another screen’s advertised maximum. The game’s Peak label is a starting target; it doesn’t guarantee that the game output or the physical screen will reach exactly that many nits.
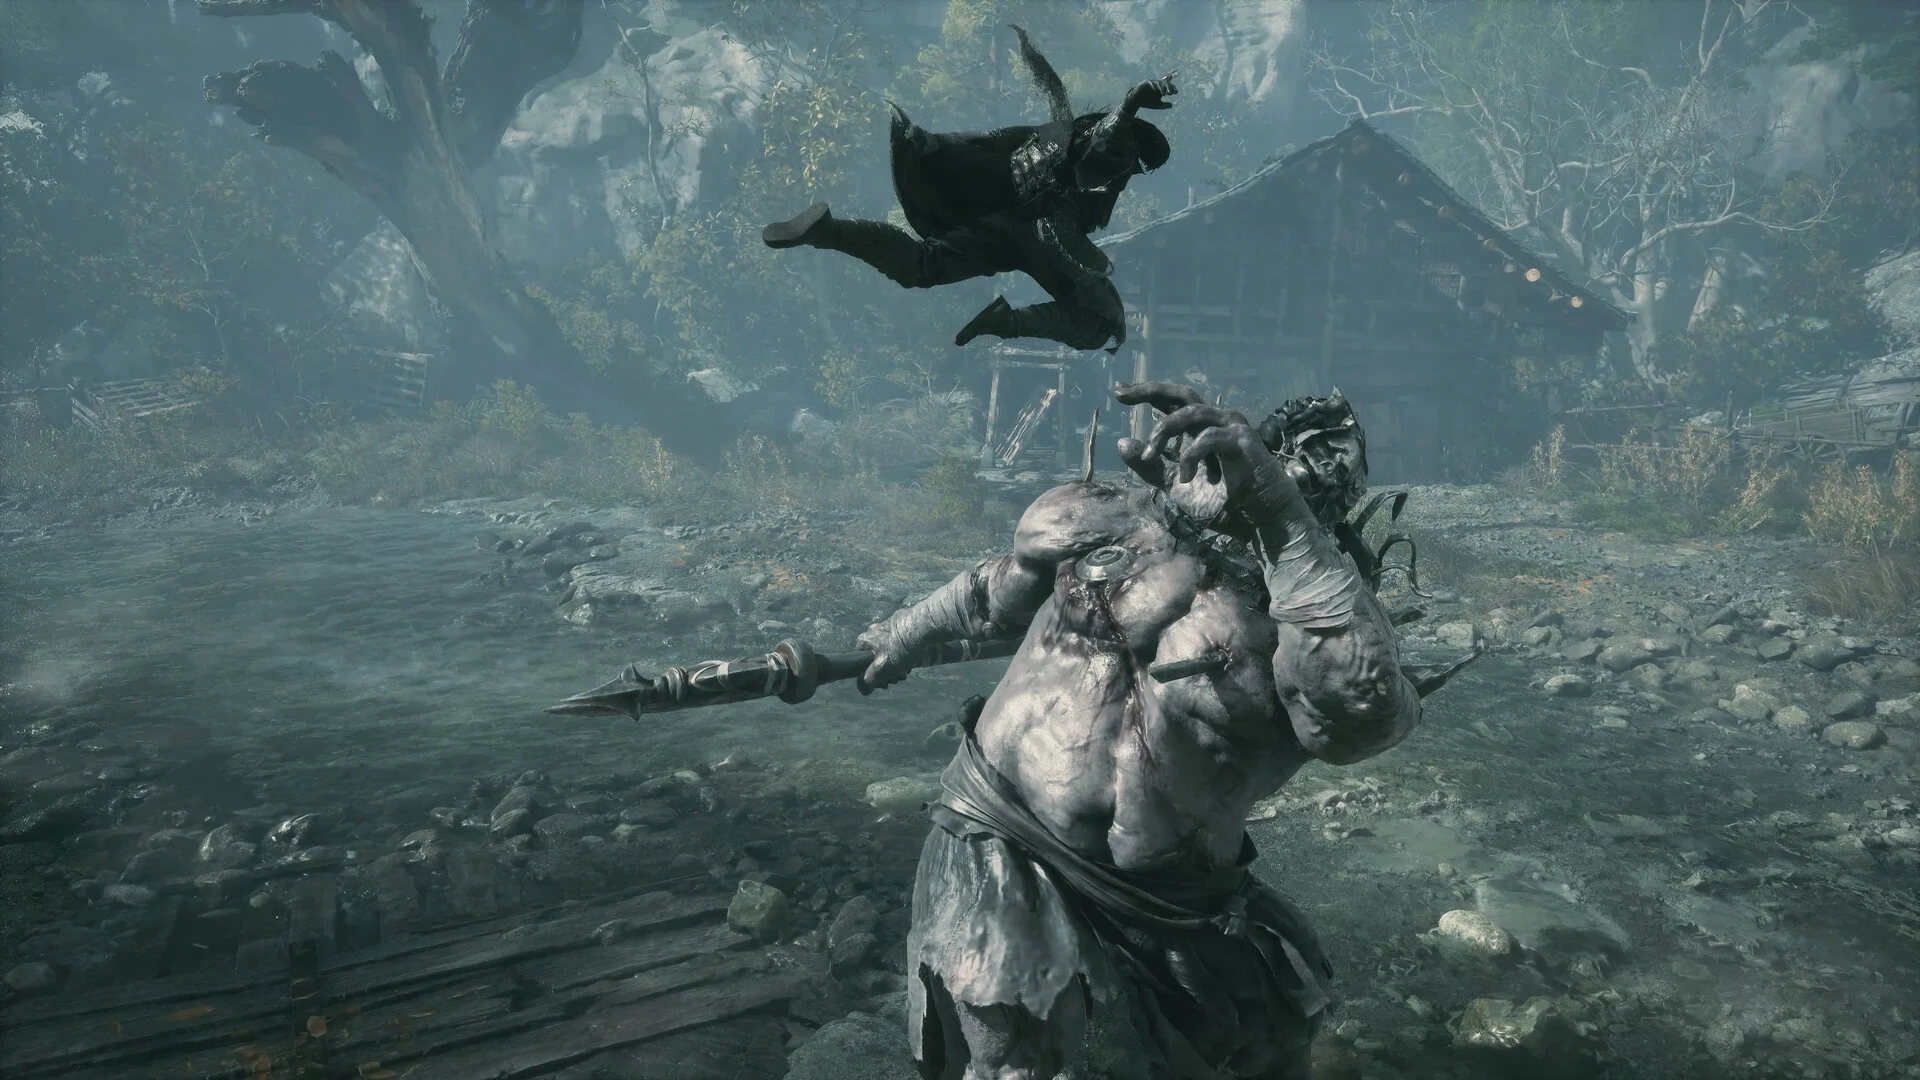
Now look at an actual scene with bright areas and shaded detail. If bright areas lose their visible structure, revisit Peak and the monitor mode. If the whole scene feels too dim or bright, adjust Mid. If only the text is glaring, change UI Brightness. Moving all three at once makes it harder to tell which change helped.
Visit another location before settling on the result. Phantom Blade Zero’s fog and lighting can soften a scene intentionally; one hazy view is a poor judge of black levels. Black crush means useful shadow detail disappears into black. Aim for readable detail while allowing dark areas to remain dark.
Once the picture is comfortable across those scenes, leave the monitor’s HDR mode fixed. If you change its output later, return to Windows calibration before readjusting the game. Our Phantom Blade Zero PC settings guide (opens in a new tab) covers the next choice: graphics quality and frame rate during combat.
If HDR is unavailable
Confirm that Windows HDR is enabled for the HDR-capable screen running the game. S-GAME also advises AMD users to disable Adrenalin’s 10-bit Pixel Format if HDR remains unavailable, then restart the game.
That option is separate from 10 bpc output color depth. The workaround is not an instruction to reduce the monitor signal to 8-bit. For other launch, crash or stutter problems, use our Phantom Blade Zero troubleshooting guide (opens in a new tab).
Frequently asked questions
What are the best Phantom Blade Zero HDR settings?
Set up the monitor and Windows HDR first. Use HDR Peak Brightness as a starting target for the display's active HDR mode, then adjust Mid Brightness for the scene and UI Brightness for comfortable text. Revisit Mid after changing Peak. A slider value does not guarantee the same measured brightness on every display.
Should I turn Auto Color Management off for HDR?
The Automatically manage color for apps switch concerns the SDR desktop. Windows already manages color when HDR is on. Turning that SDR switch off can suit a preference for stronger saturation, but it is not a Phantom Blade Zero HDR setup step.
Where should I get my monitor's ICC profile?
Start with the exact monitor's official support page. TFTCentral and PC Monitors offer some SDR profiles with matching model, revision and OSD requirements; another unit's profile may not improve yours. RTINGS provides useful setup context but advises against copying its calibration profiles.
Should I set my monitor gamma to 2.2 for HDR?
Gamma 2.2 is an SDR starting point. HDR10 uses PQ, a different brightness response. Follow your monitor's HDR-mode instructions; gamma controls may be locked while HDR is active.
Why is HDR unavailable in Phantom Blade Zero?
Check that Windows HDR is enabled for the HDR-capable monitor you are using. S-GAME also advises AMD users to disable Adrenalin's 10-bit Pixel Format if HDR remains unavailable, then restart the game. That setting is separate from the display's output color depth.

Written by
Digital Marketing Manager
Keep reading