Note: This article reflects technical best practices from the writer’s perspective and does not necessarily reflect the views of Hone.
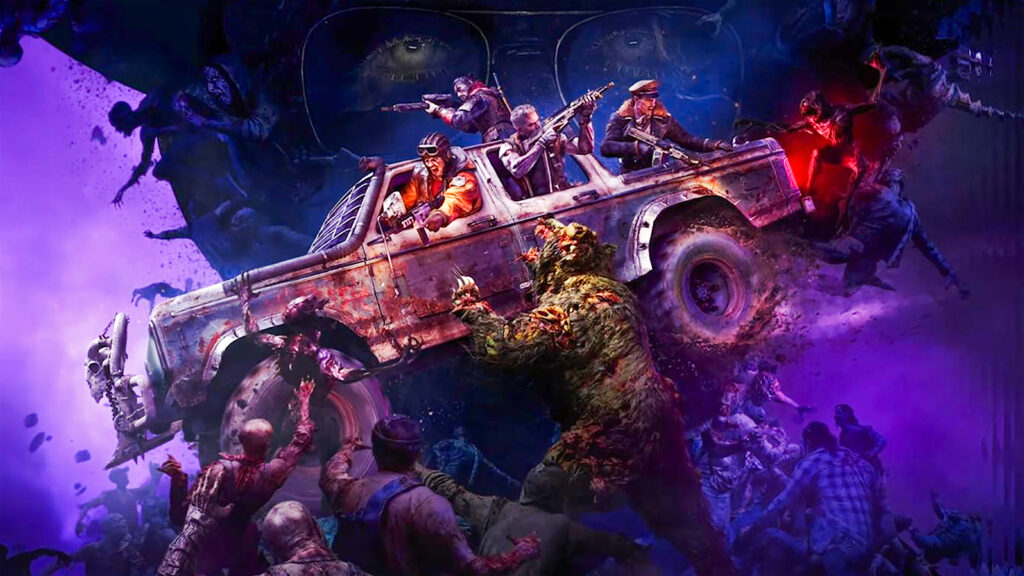
You grab the red key and your health stops regenerating. The green one locks your sprint. The yellow key disables your guns entirely. Every key in Ashes of the Damned punishes you for picking it up.
This guide shows where to find every key in the Black Ops 7 Zombies map Ashes of the Damned. You will learn exact spawn locations, debuff effects, safe retrieval strategies, and the fastest routes to complete each objective without dying to the curses these keys inflict.
Before you can hunt for main quest keys, you need to get the map operational. Two items unlock the core mechanics that make everything else possible.
🤖
T.E.D.D.’s Head
Found in Janus Towers Plaza. Activates Ol’ Tessie truck for fast travel.
🖥️
Server Room
Costs 1,250 Essence. Contains loot and headphones for music Easter egg.
Getting T.E.D.D.’s Head
This activates your primary transport vehicle
Spawn and Look Right
When you spawn in Janus Towers Plaza, enter the main building and immediately look to your right at the floor near the entrance.
Break the Grate or Interact
T.E.D.D.’s head is either visible on the floor or hidden under a grate. Melee the grate to break it if needed, then pick up the head.
Install on Ol’ Tessie
Exit the plaza and find the armored truck parked outside. Walk up to the dashboard and install T.E.D.D.’s head. The truck is now functional.
🚗Why Ol’ Tessie Matters
The truck is not optional for main quest keys. When you pick up the Trinity Keys, they inflict severe debuffs. Ol’ Tessie provides armored transport that compensates for lost health regen, disabled sprint, and weapon locks.
Trinity Keys for Main Quest (Red, Green, Yellow)
These three color coded keys unlock the Dark Aether Prism and progress the main storyline. Each one punishes you with a different debuff the moment you pick it up. You cannot grab these manually. You must have the Necrofluid Gauntlet Wonder Weapon first.
⚠️Critical Requirement
Trinity Keys require the Necrofluid Gauntlet to pick up. Skip to the Wonder Weapon section below if you do not have it yet. Without the Gauntlet, these keys are completely inaccessible.
🔴
Nightbird Key (Red)
Orda Graveyard
⚠️ Debuff Effect
Health regeneration completely disabled. All damage is permanent until you deposit the key in Ashwood.
Spawn Locations (Pick One)
Inside the mouth of the giant T-Rex skull on the western cliff. Look up from the hill to see into the skull’s jaw.
Inside the southern T-Rex skull resting on ground level. Red glow visible through eye sockets.
Near the snow covered Project Janus truck between the Diner and Ashwood. Check around vehicle tires and snow piles.
✓ Safe Retrieval Strategy
Clear all zombies before picking up. The instant you grab this key, get in Ol’ Tessie. The armored truck protects you from damage since you cannot heal. Drive straight to Ashwood pyramid.
🟢
Terrapin Key (Green)
Grounded Ship / Shipwreck
⚠️ Debuff Effect
Sprint disabled. You are forced to walk at slow speed, making you an easy target for fast zombies and Hellhounds.
Spawn Locations (Pick One)
Inside the corner of a blue shipping container on the ship’s main deck. Green glow is subtle against blue metal.
Inside the cabin structure on top deck, visible through a window. May need to jump to interact through window frame.
Underneath the ship hull on northern side between two large barrels. Dangerous choke point location.
✓ Safe Retrieval Strategy
Park Ol’ Tessie as close to the ship as possible before going in. Use Decoy Grenades or Monkey Bombs immediately after grabbing the key. Do NOT use jump pads while carrying any key as you will drop it.
🟡
Bruin Key (Yellow)
Crashed Rocket / Zarya Approach
⚠️ Debuff Effect
All firearms locked. You can only melee or use the Necrofluid Gauntlet. Standard guns are completely disabled.
Spawn Locations (Pick One)
Inside the twisted metal of the fallen radio tower pylon structure. Yellow glow contrasts with grey debris.
On corner of building roof near the array at Zarya Cosmodrome exit. Requires climbing debris or stairs to reach.
Perched on cliffside just outside Ashwood gate leading toward Cosmodrome. Exposed position.
✓ Safe Retrieval Strategy
Upgrade your melee damage with Melee Macchiato perk before retrieval. Clear the area completely before touching the key. Avoid Exploders at all costs since melee range combat with them is instant death. Get to the truck immediately.
How to Get the Necrofluid Gauntlet (Master Key)
The Necrofluid Gauntlet is the only tool that can pick up Trinity Keys. This Wonder Weapon is mandatory for main quest progression. Getting it requires solving a visual puzzle at Vandorn Farm during lightning strikes.
Necrofluid Gauntlet Unlock Steps
This Wonder Weapon is required to interact with main quest keys
Wait for Lightning Strikes
Progress through rounds until you see lightning striking the map. This is visible from Exit 115 or while using Jump Pads.
Use Jump Pad at Vandorn Farm
Go to Vandorn Farm and use a Jump Pad to launch into the air. While airborne, look at the farm rooftops.
Spot the Three Red Glyphs
Three distinct red symbols appear on the roof structures during lightning. Memorize these symbols. They change every match, so you must do this fresh each game.
Input Code at Mysterious Cube
Land and find the Mysterious Cube at Vandorn Farm. Input the three symbols you saw in the correct order.
Collect Necrofluid Gauntlet
Correct entry opens the Cube and dispenses the Necrofluid Gauntlet. Pick it up. You can now interact with and carry Trinity Keys.
🎯Pro Tip
The glyph code is randomized every match. You cannot use a previous game’s solution. Always check the rooftops fresh when lightning strikes, even if you have done this before.
Vandorn Family Artifacts (Barn Cellar Puzzle)
The Barn Cellar at Vandorn Farm contains a Mysterious Box that requires collecting four family artifacts plus crafting a biological key from zombie bones. This side quest unlocks rewards and lore.
🧸 Tasty Face Teddy Bear
Farmhouse second floor on the bunk beds. Navigate upstairs and check the children’s bedroom area.
🎭 Junior’s Fun Face Mask
Barn upper floor in the corner of the loft area. Climb the stairs inside the barn and search the loft corners.
🍷 Ma’s Chalice
Barn Cellar next to the bathtub. Same room as the Mysterious Box. Easy to miss due to dark lighting.
⏰ Pa’s Pigticker (Clock)
Garage workbench. This is the detached garage structure, not the main house. Check the tool bench.
Find the Hanging Corpse
A zombie corpse hangs from the center of the Barn. You need to harvest bones from this body.
Equip Combat Axe
Make sure you have a Combat Axe as your lethal equipment. This is required to sever the limb.
Throw Axe at Corpse Leg
Aim at the corpse’s leg and throw the Combat Axe. This severs the foot, causing it to drop to the barn floor.
Burn the Foot with Molotov
Equip a Molotov Cocktail and throw it onto the severed foot. The flames will burn away the flesh.
Collect Human Bones
After the fire dies, Human Bones remain. Pick them up. This is the biological key for the Mysterious Box.
🕐Clock Puzzle Solution
After collecting all four family artifacts and the Human Bones, go to the Barn Cellar. Roman numerals are etched into the floor in a clock pattern. Look at the wall clock and note the time. Stand on the floor Roman numeral that matches that time. The father’s corpse will animate and look at you. Shoot the corpse with the Necrofluid Gauntlet to complete the puzzle and unlock the Mysterious Box.
Upgrade Keys for Weapons and Vehicles
These keys drop from specific enemies or locations and unlock powerful upgrades for Ol' Tessie and other equipment. Unlike static spawn keys, these require triggering specific events or killing high value targets.
Starting around Round 5, a special Cook zombie spawns inside Reba's Diner. This enemy wears chef attire.
Kill the Cook zombie INSIDE the diner building. The Freezer Key only drops if the kill happens within the diner boundaries.
✓ What It Unlocks
Use the Freezer Key on the double door freezer in the southwest corner of the diner kitchen. Inside is the Abomination Carcass. Transport this to Ashwood garage to install the Abomination Beam upgrade on Ol' Tessie.
👁️
Ravager Eyes
Reba's Diner Trap
How to Get
Activate the Saw Blade Trap inside Reba's Diner for 2,000 Essence.
Wait for Ravager zombies to spawn. These are fast, aggressive enemies.
Lure Ravagers into the active saw trap. The trap will kill them and drop golden Ravager Eyes on the floor.
✓ What It Unlocks
Ravager Eyes are a crafting ingredient for serums and certain Wonder Weapon upgrades. Collect multiple if possible.
💎
Stabilizer Chip
Janus Towers Plaza Boss
How to Get
Progress through rounds until Uber Klaus boss spawns in Janus Towers Plaza.
Target the glowing purple weak points on Uber Klaus shoulders to break armor.
Defeat Uber Klaus. He drops the Stabilizer Chip on death.
✓ What It Unlocks
Take the Stabilizer Chip to the Sheriff's Office in Ashwood. Use it to repair and activate Friendly Klaus, who fights as your ally.
Carry it to three power pumps: Blackwater Lake, Ashwood, and Vandorn Farm.
At each pump, the barrel triggers a defensive lockdown event. Survive all three.
✓ Critical Warning
You cannot use Jump Pads while carrying the Aether Barrel or you will drop it. Walk or use Ol' Tessie to transport between pump locations. Completing all three pumps charges the barrel for main quest use.
Music Easter Egg Headphones
Three headphone sets are hidden across the map. Finding all three unlocks the hidden song Turn to Ashes by Elena Siegman and Kevin Sherwood. Each headphone plays a maniacal laugh when you interact with it correctly.
Headphone Locations Checklist
Headphones 1: Janus Towers Server Room on cabinet opposite Quick Revive. Costs 1,250 Essence to access room. May need to jump to interact.
Headphones 2: Ashwood church area. Check upper levels and corners near religious iconography.
Headphones 3: Vandorn Farm house. Search bedrooms and common areas on both floors.
🎵Confirmation Cue
Each headphone you interact with correctly triggers a maniacal laugh sound. This confirms you activated that specific headphone. After finding all three, the full song unlocks and plays automatically.
Key Collection Priority Order
Not all keys are equal in importance. This priority list helps you focus on the right objectives at the right time without wasting rounds.
Optimal Key Collection Sequence
Follow this order for efficient progression
Round 1: T.E.D.D.'s Head
First priority. Get Ol' Tessie operational immediately for map traversal and later key transport.
Round 2-4: Necrofluid Gauntlet
Watch for lightning strikes and solve the Vandorn rooftop glyph puzzle. This unlocks Trinity Key access.
Round 5+: Freezer Key
Hunt the Cook zombie at Reba's Diner for vehicle upgrades. This improves survivability for later key runs.
Mid Game: Trinity Keys
Collect Nightbird (red), Terrapin (green), and Bruin (yellow) keys one at a time. Never carry multiple keys simultaneously. Deposit each in Ashwood before getting the next.
Optional: Vandorn Artifacts
If pursuing the Barn Cellar puzzle, collect the four family items and craft the Human Bones key when convenient.
Conclusion
Every key in Ashes of the Damned serves a specific purpose, and most come with severe penalties when carried. Start with T.E.D.D.'s head to activate your truck, then rush the Necrofluid Gauntlet to unlock Trinity Key access. Collect the three main quest keys one at a time using Ol' Tessie for transport to counter the debuffs. Side objectives like the Freezer Key, Vandorn artifacts, and music headphones can be grabbed during downtime between main quest steps. The key to survival is never carrying a cursed key for longer than necessary. Get in the truck, drive to the deposit point, and move on to the next objective immediately.
FAQ
Can I pick up Trinity Keys without the Necrofluid Gauntlet
No. The Nightbird, Terrapin, and Bruin keys are completely inaccessible without the Necrofluid Gauntlet Wonder Weapon. You must solve the Vandorn Farm rooftop glyph puzzle during lightning strikes to unlock the Gauntlet first.
What happens if I use a jump pad while carrying a key
You will drop the key and have to go back and pick it up again. Jump pads force you to release carried items. Use Ol' Tessie truck for transport instead, or walk if the truck is unavailable.
Do Trinity Keys spawn in the same location every game
No. Each Trinity Key has three possible spawn points in its designated area. The spawn location is randomized every match. You must check all three spots each game until you find the glowing key.
How do I get the Freezer Key to spawn
The Freezer Key drops from a special Cook zombie that spawns at Reba's Diner starting around Round 5. You must kill this zombie inside the diner building for the key to drop. If you kill the Cook outside, the key will not appear.
What debuff does each Trinity Key give you
Nightbird red key disables health regeneration, Terrapin green key locks your sprint forcing you to walk, and Bruin yellow key disables all firearms leaving you with melee and Wonder Weapon only. All debuffs clear when you deposit the key in Ashwood.
Can I carry multiple Trinity Keys at once
No. You can only carry one key at a time. The debuffs are severe enough that attempting to stack them would make you nearly helpless. Collect and deposit keys one by one in Ashwood before retrieving the next.
Where is T.E.D.D.'s head located exactly
T.E.D.D.'s head is in the Janus Towers Plaza spawn building on the floor to the right of the main entrance. It may be under a metal grate that you need to melee to break, or sitting visible on the floor.
How do I solve the Vandorn Farm clock puzzle
After collecting all four family artifacts and Human Bones, go to the Barn Cellar. Look at the wall clock to see what time it shows. Stand on the floor Roman numeral that matches that time. The father's corpse will animate. Shoot it with the Necrofluid Gauntlet to complete the puzzle.
What are Ravager Eyes used for
Ravager Eyes are crafting ingredients for serums and certain Wonder Weapon upgrades. Collect them by activating the Saw Blade Trap at Reba's Diner for 2,000 Essence and luring Ravager zombies into the trap blades.
Why can't I pick up the Aether Barrel
The Aether Barrel is part of the main quest progression. If you cannot interact with it, you likely need to complete earlier quest steps first. Progress through the Trinity Keys and ensure you have deposited them all in Ashwood before the barrel becomes accessible.
Full Performance, No Cost
Kick off an exciting adventure for free! Just download the app, create your account, and enjoy up to 20 optimizations at no cost.
Cookie preferences
Hone uses cookies and similar technologies to measure performance and improve ads. You can accept all cookies or keep only necessary cookies.