Every pixel, every click, every frame; it all adds up. Your settings aren’t just background noise, but the difference between hitting first or falling flat. We’ve torn through the data, tested every tweak, and built this guide to help you lock in the perfect Valorant setting that wins fights.
- Always use Fullscreen mode and disable VSync for minimum input lag
- NVIDIA Reflex Low Latency: Use “On” for higher FPS, or “On + Boost” for lower latency
- Enemy Highlight Color set to Yellow (Deuteranopia) makes enemies much easier to spot
- Use Raw Input Buffer for most consistent mouse performance
- Enable HRTF for better directional audio, but preference may vary; test it yourself
- Pro eDPI range is typically between 200-400 (avg ~280) for precision aiming
- Lower detail settings provide competitive advantage by reducing visual clutter
Graphics & Video Settings in Valorant
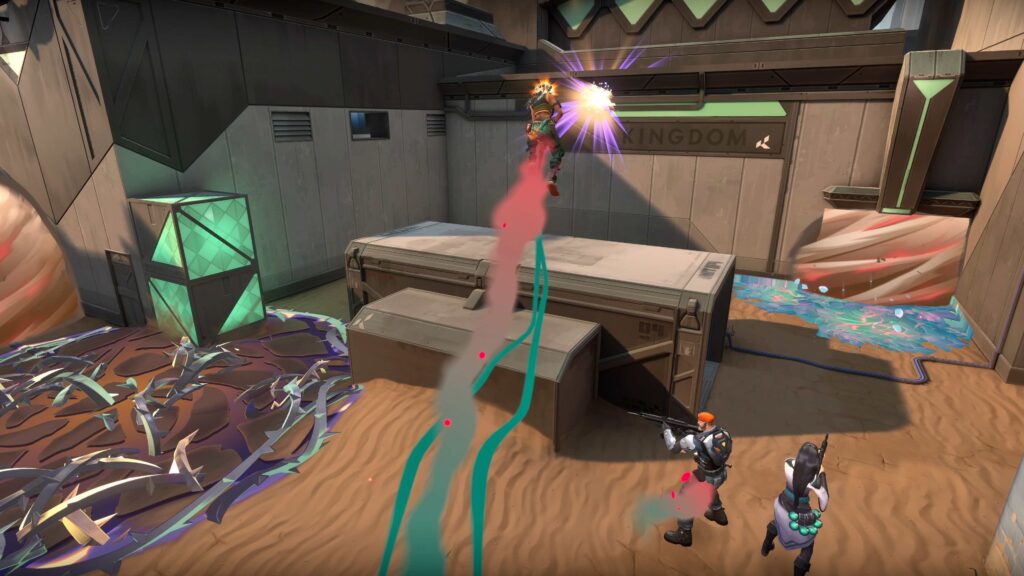
Graphics settings in VALORANT directly impact your competitive advantage. The right tweaks boost your Valorant FPS, cut input lag, and help enemies pop against the map.
I’ll walk you through the settings that actually give you an edge.
These foundational settings should be configured identically regardless of your PC specs or personal preferences:
| Setting | Value | Impact |
|---|---|---|
| Display Mode | Fullscreen | Provides lowest input lag and better performance |
| Resolution | Native Resolution | Optimal clarity and image quality |
| VSync | Off | Eliminates input lag at the cost of potential screen tearing |
| NVIDIA Reflex Low Latency | On + Boost | Reduces system latency significantly |
| Limit FPS | Off | Allows maximum performance (some may prefer capping for stability) |
These settings offer the biggest trade-offs between visual quality and competitive advantage:
| Setting | Recommended | Impact |
|---|---|---|
| Multithreaded Rendering | On | Utilizes multiple CPU cores for better performance |
| Material Quality | Low | Higher settings add detail but can obscure enemies |
| Texture Quality | Low-Medium | Affects surface detail and sharpness |
| Detail Quality | Low | Critical for reducing distracting visual elements |
| UI Quality | Low | Minimal performance impact, personal preference |
These settings should almost always be disabled for competitive play:
| Setting | Recommended | Impact |
|---|---|---|
| Vignette | Off | Darkens screen edges, reducing peripheral visibility |
| Distortion | Off | Creates visual noise during ability effects |
| Bloom | Off | Creates glow effects that can obscure enemy outlines |
| Experimental Sharpening | Off | Heavy performance hit for minimal visual benefit |
Complete Graphics Settings Breakdown
| Setting | Recommended | Impact |
|---|---|---|
| Display Mode | Fullscreen | Dedicated full resources to the game, reduces input lag significantly |
| Resolution | Native Monitor Resolution | Clearest image quality; lower resolutions boost FPS but reduce clarity |
| Aspect Ratio Method | Letterbox | Preserves intended field of view; “Fill” stretches image (some prefer for wider targets) |
| Limit FPS Always | Off | Allows maximum frames for lowest input lag |
| NVIDIA Reflex Low Latency | On + Boost | Reduces system latency; virtually no downside on modern hardware |
| Setting | Recommended | Impact |
|---|---|---|
| Multithreaded Rendering | On | Utilizes multiple CPU cores; always beneficial on modern systems |
| Material Quality | Low | Higher settings add surface detail but can make enemy detection harder |
| Texture Quality | Low-Medium | Affects texture sharpness; low settings reduce visual noise |
| Detail Quality | Low | CRITICAL setting; reduces environmental clutter that can hide enemies |
| UI Quality | Low | Minimal performance impact; affects HUD sharpness |
| Vignette | Off | Darkens screen edges; detrimental to peripheral vision |
| VSync | Off | Prevents screen tearing but adds significant input lag |
| Anti-Aliasing | None / MSAA 2x | None can make edges more distinct; MSAA for cleaner visuals with performance cost |
| Anisotropic Filtering | 1x | Higher values sharpen textures at angles; minimal competitive benefit |
| Improve Clarity | Situational | Can help enemies stand out but costs 5%+ FPS; test personally |
| Experimental Sharpening | Off | Massive performance hit for minimal visual gain |
| Bloom | Off | Creates glow effects that can obscure enemy outlines |
| Distortion | Off | Adds visual noise during abilities that can reduce clarity |
| Cast Shadows | Off | Controls player’s own shadow; disabling reduces visual clutter |
| Setting | Recommended | Impact |
|---|---|---|
| Client FPS | Text Only | Monitors performance; useful for troubleshooting |
| Network Round Trip Time | Text Only | Displays ping; critical for understanding network performance |
| Packet Loss | Text Only | Shows connection stability issues |
| Other Stats | Hide | Rarely needed except for specific troubleshooting |
Don’t overlook these crucial settings that dramatically improve enemy visibility:
| Setting | Recommended | Impact |
|---|---|---|
| Enemy Highlight Color | Yellow (Deuteranopia) | Makes enemies stand out significantly better against most map backgrounds |
| Show Corpses | Off | Prevents confusing dead bodies for live enemies |
| Network Buffering | Minimum | Reduces input delay (with stable connection) |
Pro Tip: GPU Driver Settings Matter
Don’t forget to optimize your NVIDIA/AMD control panel settings too. For NVIDIA cards, set “Power Management Mode” to “Prefer Maximum Performance.” Skip “Low Latency Mode” – Valorant uses NVIDIA Reflex, which overrides it. These tweaks can reduce input lag and improve system stability beyond in-game settings alone.
Mouse Settings
Mouse Settings: Precision Is Everything
🔗 Our Recommendation: Set your DPI to 1600. Period. It’s the optimal blend of precision, responsiveness, and reliability. Pair it with a low-to-medium in-game sensitivity (0.25–0.4) to achieve the ideal eDPI range of 200–440, depending on your playstyle.
Mouse settings are the most personal part of any VALORANT setup. There’s no one-size-fits-all sensitivity, but studying how the pros dial theirs in helped us find the sweet spot.
Here’s how we break down the key settings that actually affect your aim.
eDPI = DPI × In-game Sensitivity
Most professional players use an eDPI between 200-300, with the average around 280.
Lower eDPI (200-300) generally favors precision aiming, while higher values can benefit quick reactions and entry fragging.
The most critical mouse settings revolve around sensitivity and input processing:
| Setting | Recommended | Impact |
|---|---|---|
| DPI (Dots Per Inch) | 800 or 1600 | Hardware sensitivity of your mouse; most pros use these values |
| In-game Sensitivity | 0.2-0.8 | Software multiplier; adjust based on your DPI |
| eDPI | 200-300 | DPI × In-game sensitivity; aim for this overall range |
| Scoped Sensitivity Multiplier | 1.0 | Standard for consistent muscle memory |
While lower sensitivities (200-300 eDPI) favor precision aiming, higher sensitivities can benefit quick reactions and entry fragging. We recommend starting at around 280 eDPI (e.g., 800 DPI × 0.35 sensitivity) and adjusting based on your playstyle.
These settings affect how your mouse inputs are processed by the game:
| Setting | Recommended | Impact |
|---|---|---|
| Polling Rate | 1000Hz | More responsive tracking with higher rates |
| Raw Input Buffer | On | More direct mouse input processing |
| Windows Sensitivity | 6/11 (default) | |
| Mouse Acceleration | Disabled | Provides consistent cursor movement (some pros like TenZ use custom acceleration) |
| Setting | Pro Range/Value | Recommended | Impact |
|---|---|---|---|
| DPI | 1600 | 1600 | Base sensitivity of your mouse; choose one and stick with it |
| In-game Sensitivity | 0.2 – 0.8 | 0.25 – 0.45 | Multiplier for your DPI; lower values give more precision |
| eDPI | 200 – 400 | ~280 | DPI × Sensitivity; the true measure of overall sensitivity |
| Scoped Sensitivity | 1.0 | 1.0 | Keeps ADS sensitivity consistent with hipfire for better muscle memory |
| Polling Rate | 1000Hz | 1000Hz | How often mouse position updates; higher is more responsive |
| Raw Input Buffer | On | On | Bypasses Windows processing for more direct mouse input |
Pro Tip: The Sensitivity Testing Method
To find your ideal sensitivity, try this pro technique: Load into the Range and place your crosshair on a target’s head. Strafe left and right while trying to keep your crosshair on target. If you’re overshooting, lower your sensitivity. If you’re undershooting, raise it. Repeat until you can smoothly track the target while moving. Then confirm by testing flick shots to different targets.
Audio Settings
VALORANT’s sound design provides critical information through footsteps, ability cues, and weapon sounds. Optimizing your audio settings can give you a significant competitive edge by improving your awareness of enemy positions and actions.
These settings should be prioritized for competitive advantage:
| Setting | Recommended | Impact |
|---|---|---|
| Enable HRTF | ON | Crucial for enhancing directional audio cues |
| Speaker Configuration | Stereo | Required for proper HRTF functioning |
| Sound Effects Volume | 80-100% | Needed to hear footsteps and abilities clearly |
| Voice-over Volume | 40-60% | Keep agent voices audible but not distracting |
| All Music Overall Volume | 0% | Music can mask critical game sounds |
Properly configured voice chat is essential for team coordination:
| Setting | Recommended | Impact |
|---|---|---|
| Incoming Voice Chat Volume | 40-50% | Clear enough to hear callouts without overwhelming game sounds |
| Voice Chat Mode | Push-to-Talk | Prevents broadcasting unnecessary noise to teammates |
| Party/Team Voice Chat | Enabled | Critical for coordination |
| VOIP Ducks Music | Enabled | If you keep any music on, this ensures calls are audible |
| Setting | Recommended | Impact |
|---|---|---|
| Enable HRTF | On | Critical for accurately positioning sounds in 3D space |
| Speaker Configuration | Stereo | Required for HRTF to function properly |
| Sound Effects Volume | 80-100% | Primary game sounds including footsteps and abilities |
| Voice-over Volume | 40-60% | Agent voice lines and announcer callouts |
| All Music Overall Volume | 0% (Off) | Disabling music prevents it from masking important game sounds |
| Agent Select Music | 30-50% | Optional for menu ambiance; no competitive impact |
| VOIP Ducks Music | On | Lowers music volume during voice chat if music is enabled |
| Voice Chat Mode | Push-to-Talk | Prevents broadcasting unwanted background noise |
Pro Tip: Disable External Surround Sound
If you use a gaming headset, make sure to disable any built-in virtual surround sound features like Dolby Atmos, Windows Sonic, or headset-specific surround. These will conflict with VALORANT’s HRTF processing and actually make positional audio worse. Let VALORANT handle the spatial audio processing for optimal results.
Configuration Profiles
I’ve built three go-to configuration profiles; each tuned for a different priority. Pick the one that fits your goals and your gear, then fine-tune from there.
For players with powerhouse GPUs like RTX 4000 series who want beautiful visuals without sacrificing competitive edge.
- Native Resolution at highest refresh rate
- Material Quality: High
- Texture Quality: High
- Detail Quality: High
- Anti-Aliasing: MSAA 4x
- Anisotropic Filtering: 16x
- Improve Clarity: On
- Bloom: Subtle (On)
- Cast Shadows: On
- All competitive essentials still maintained
Maximizes your ability to spot enemies with settings that make opponents “pop” from the environment.
- Material Quality: Low
- Texture Quality: Low/Medium
- Detail Quality: Low
- Anti-Aliasing: None or MSAA 2x
- Anisotropic Filtering: 1x
- Improve Clarity: On
- All effects (Bloom, Distortion): Off
- Enemy Highlight: Yellow (Deuteranopia)
- Show Corpses: Off
- HRTF enabled for maximum awareness
Squeezes every possible frame from your system for ultimate responsiveness. Ideal for competitive players and lower-end hardware.
- All Graphics Quality settings: Low
- Anti-Aliasing: None
- Anisotropic Filtering: 1x
- All visual effects disabled
- Resolution: Native (or lower if needed)
- Optional 4:3 stretched for wider enemy models
- Multithreaded Rendering: On
- NVIDIA Reflex: On + Boost
- Stripped graphics for absolute performance
C:\Users\[YourUsername]\AppData\Local\VALORANT\Saved\Config
Pro Player Valorant Settings
I’ve spent a lot of time digging through pro player settings; and there are some clear patterns. While we wouldn’t recommend copying a pro’s setup 1:1 (their gear and playstyle are probably different from mine or yours), the trends are still worth studying.
They give us a baseline to work from. If dozens of top players all lean toward certain settings, there’s probably a good reason; and we use that info to shape our own setup.
| Player | Main Role | DPI | Sensitivity | eDPI | Raw Input | Display Mode | Resolution | Detail Quality | Anti-Aliasing | Enemy Highlight |
|---|---|---|---|---|---|---|---|---|---|---|
| TenZ | Duelist | 1600 | 0.156 | 250 | On | Windowed-Fullscreen | 1440×900 | Low | MSAA 2x | Yellow (D) |
| Asuna | Duelist | 1400 | 0.26 | 364 | Off | Fullscreen | 1920×1080 | Low | None | Yellow (D) |
| ShahZaM | Sentinel | 800 | 0.265 | 212 | On | Fullscreen | 1920×1080 | Low | MSAA 4x | Red (Default) |
| SicK | Controller | 800 | 0.235 | 188 | On | Fullscreen | 1920×1080 | Low | None | (Not Listed) |
| Hiko | Initiator | 1600 | 0.36 | 576 | On | Fullscreen | 1680×1050 | Medium | MSAA 2x | Yellow (D) |
| ScreaM | Duelist | 400 | 0.73 | 292 | On | Fullscreen | 1920×1080 | Low | MSAA 4x | Yellow (D) |
| dapr | Sentinel | 1600 | 0.16 | 256 | On | Fullscreen | 1920×1080 | Low | MSAA 4x | Red (Default) |
| nitr0 | Controller | 400 | 0.70 | 280 | On | Fullscreen | 1680×1050 | Low | (—) | (Not Listed) |
| crashies | Initiator | 800 | 0.23 | 184 | On | Fullscreen | 1920×1080 | Low | MSAA 4x | Red (Default) |
| Derke | Duelist | 400 | 0.74 | 296 | Off | Fullscreen | 1920×1080 | Low | MSAA 4x | Red (Default) |
Pros still squeeze every frame they can, but a few patterns have shifted in 2025:
- Display Mode: 90 % Fullscreen, 10 % Windowed-Fullscreen (TenZ)
- Material Quality: 80 % Low, 20 % Medium
- Texture Quality: 90 % Low, 10 % Medium
- Detail Quality: 90 % Low, 10 % Medium
- VSync: 100 % Off
- Anti-Aliasing: 60 % MSAA 4×/2×, 30 % None, 10 % Unset
- Effects: Bloom, Vignette & Distortion remain disabled across the board
- Enemy Highlight: 50 % Yellow (Deut.), 40 % Red (Default), 10 % Other/Unset
The meta is unchanged: strip detail, keep clarity, and let raw frames win fights; only TenZ experiments with a non-fullscreen mode.
Mouse numbers drift, but the sweet spots stay tight:
- eDPI Range: 184 – 576 (cluster still 250 – 300)
- DPI Choices: 400, 800, 1400, 1600 (even split between 400 / 800 and high-DPI users)
- In-game Sens: 0.156 – 0.74; most hover 0.23 – 0.33 on 800 DPI
- Polling Rate: 1000 Hz across every pro
- Scoped Sensitivity: 1.0 for 100 % of players
- Raw Input Buffer: On for 8 / 10 pros (Asuna & Derke keep it Off)
Duelists trend higher (eDPI ≈ 290–360); Sentinels & Controllers hug the low end for pixel-perfect holds.
| Pro Player | DPI | Sensitivity | eDPI | Graphics Snapshot |
|---|---|---|---|---|
| TenZ | 1600 | 0.156 | 250 | 1440 × 900, Low, MSAA 2×, Windowed-FS |
| Asuna | 1400 | 0.26 | 364 | 1080p, Low, AA Off, Red outlines |
| ShahZaM | 800 | 0.265 | 212 | 1080p, Low, MSAA 4×, Red outlines |
| Hiko | 1600 | 0.36 | 576 | 16:10 (1680×1050), Medium textures, MSAA 2× |
| ScreaM | 400 | 0.73 | 292 | 1080p, Low, MSAA 4×, Yellow outlines |
Note how TenZ and Hiko break the mold (higher DPI or medium textures) yet still land inside the broader performance-first philosophy.
Pro Tip: Settings Are Just Tools
Remember that even perfect settings won’t automatically make you a better player. They simply remove obstacles and optimize your gameplay environment. Consistent practice, crosshair placement, game sense, and communication remain the most important factors in improving at VALORANT.
Note: It’s worth noting that TenZ likely uses Windowed-Fullscreen for the convenience of fast alt-tabbing and multi-monitor control while streaming. Fullscreen still offers the best performance and lowest input lag; it’s the competitive standard.
Find Your Optimal Sens – PSA Method Calculator
Pro players don’t guess their sensitivity, they dial it in with precision. The PSA Method (Perfect Sensitivity Approximation) is a systematic way to find the sensitivity that feels best for your aim, instead of copying someone else’s.
Here’s how it works:
- Start with your current sens; the one you’re most used to.
- The calculator gives you two new values: one slightly higher, one slightly lower.
- Test both in the Range or Deathmatch.
- Pick the one that feels smoother; for flicks, tracking, and crosshair control.
- That becomes your new base. Repeat the process (usually 5–7 times) until the difference is minimal and your aim feels locked in.
Use the calculator below to simulate each round of testing. You’ll see a table showing each step and your final optimized sens.
Step 1 / —
Test both sens values in-game, then click the one that felt better.
0 VS HIGHER
0
| Step | Lower | Higher | Chosen |
|---|
Custom Valorant Setting Recommendations
Every player has unique preferences, hardware, and goals. Here are our recommendations for finding your perfect settings based on common scenarios.
If your PC struggles to maintain 60+ FPS consistently:
| Setting | Recommendation |
|---|---|
| Profile | Follow the Maximum FPS Profile strictly |
| Resolution | Consider lowering below native (e.g., 1600×900) |
| Graphics Quality | Set all options to Low |
| Background Applications | Disable all non-essential programs |
| GPU Drivers | Keep updated regularly |
| Process Priority | Set VALORANT to High Priority in Task Manager |
For serious competitive players with decent hardware:
| Setting | Recommendation |
|---|---|
| Profile | Use the Absolute Enemy Visibility profile |
| eDPI | Find a value between 240-320 for balanced precision and speed |
| Enemy Highlight | Yellow (Deuteranopia) for maximum visibility |
| Audio | HRTF On, Music Off for maximum sound awareness |
| Visual Effects | Disable Bloom, Distortion, Show Corpses |
| Quality Settings | Keep Material and Texture Quality at Low/Medium |
If you have a top-tier system and want balanced visuals and performance:
| Setting | Recommendation |
|---|---|
| Profile | Start with the Visually Stunning profile |
| Detail Quality | Keep at Low despite having powerful hardware |
| Anti-Aliasing | MSAA 4x for cleaner visuals |
| Anisotropic Filtering | High (8x or 16x) for sharper distant textures |
| Improve Clarity | Test to see if you prefer it visually |
| Bloom | Subtle or disabled during ranked play |
If you’re experiencing performance problems, try these solutions:
- FPS Drops: Enable Multithreaded Rendering, update GPU drivers, close background applications
- Input Lag: Ensure Fullscreen mode, disable VSync, enable Raw Input Buffer and NVIDIA Reflex
- Audio Positioning Issues: Verify HRTF is enabled, disable any external/headset surround sound
- Enemies Hard to See: Try Yellow (Deuteranopia) highlight, lower Detail Quality, disable Bloom
- Stuttering: Set Limit FPS Always to just above your monitor’s refresh rate (e.g., 240 for 240Hz)
Most Underrated Settings (That Actually Matter)
Not every setting gets the spotlight, but a few overlooked ones quietly carry your games. These aren’t just preferences; they’re edge cases that add up.
- Enemy Highlight Color: Yellow (Deuteranopia)
You don’t need colorblindness to benefit. This variant creates the strongest contrast across nearly every Valorant map, making enemies “pop” instantly. It’s a low-effort visibility buff. - Show Corpses: Off
Dead bodies can bait your brain into unnecessary aim adjustments. Disabling them cleans up the battlefield visually and mentally. - Raw Input Buffer: On
Especially if you’re using a high polling rate mouse. This setting reduces any Windows-level interference with your aim precision. - VOIP Ducks Music: Enabled
If you’re one of the few who keeps menu or agent music on, this ensures team comms always punch through. - Distortion: Off
Often left on by default. It adds zero competitive value and blurs the screen during key moments; especially with agent abilities. Kill it. - Vignette: Off
Aesthetic? Maybe. But it subtly darkens your screen edges and limits peripheral awareness. No thanks.
Conclusion
Tuning your VALORANT settings is part science, part feel. This guide gives you a proven starting point, from pro trends to tested benchmarks, but the final call is yours. Pick a setup that fits your style, then tweak until every click feels right.
While most settings are flexible, a few; like Fullscreen mode, VSync Off, and NVIDIA Reflex On, are non-negotiables for competitive performance. Stick with those.
Test changes in the Practice Range or unrated games before jumping into ranked. Your ideal config won’t match anyone else’s exactly; and that’s the point. With this foundation, you’re ready to build a setup that plays to your strengths.
FAQs
What are the most important VALORANT settings for performance?
The most critical settings are: Display Mode (Fullscreen), VSync (Off), Multithreaded Rendering (On), Detail Quality (Low), and NVIDIA Reflex (On + Boost). These minimize input lag and maximize frame rates for the most responsive gameplay experience.
What mouse sensitivity do pro VALORANT players use?
Most pros use an eDPI (DPI × sensitivity) between 200-300, averaging around 280. They typically run either 800 or 1600 DPI with sensitivity adjusted to fit this range. Lower eDPI favors precision; higher supports fast reactions.
Should I turn on Raw Input Buffer in VALORANT?
Yes, it stabilizes input for high polling rate mice (e.g., 2000Hz+), reducing CPU overhead. While Valorant already uses raw input, this setting minimizes polling disruptions and boosts responsiveness.
What is the best enemy highlight color in VALORANT?
Yellow (Deuteranopia) stands out best against map backgrounds. Purple (Tritanopia) is also good. Choose a highlight color that contrasts with your crosshair for clarity.
Should I cap my FPS in VALORANT?
Set “Limit FPS Always” to Off for minimal input lag. If you experience stuttering or temperature issues, cap it slightly above your monitor’s refresh rate (e.g., 165 FPS on 144Hz). Benefits diminish above 1.5× refresh rate.
Is HRTF important in VALORANT?
Yes! HRTF significantly improves 3D audio for locating sounds like footsteps and abilities. Use stereo headphones and disable external surround effects to let Valorant handle positional audio.
What resolution do most VALORANT pros use?
Most pros stick to 1920×1080 (1080p) for balance of clarity and performance. Some use lower resolutions or stretched 4:3 for bigger hitboxes, but native 1080p remains the standard.
How do I find my perfect sensitivity in VALORANT?
Start with an eDPI of 800–1600 (e.g., 800 DPI × 0.35). Practice tracking and flick shots. Adjust sensitivity up or down based on overshooting or undershooting until it feels natural and precise.

 Discord
 Instagram
 Youtube
 TikTok