GTA 5 on PC looks simple to optimize until you remember how many Rockstar sliders stack on top of each other. Grass crushes performance outside the city, shadows can pile on cost fast, reflections matter more at night than they do at noon, and the wrong long-distance settings quietly tax both the CPU and GPU at the same time.
There is another catch now. Since March 2025, PC players are not dealing with one graphics menu anymore. GTAV Enhanced and GTAV Legacy are different branches with different priorities. Enhanced is about ray tracing, upscaling, Reflex, and modern APIs. Legacy is still the classic DX11 era menu with TXAA, PCSS, and the old advanced graphics traps.
This guide separates the two, then narrows the conversation to the settings that actually change image quality, shadow fidelity, pop-in, and frame rate. The goal is not to max every option. The goal is to make Los Santos look clean, feel smooth, and stop wasting performance on settings you barely notice when you are actually driving, flying, or in a firefight.
Stop Mixing Enhanced And Legacy Advice
The best GTA 5 settings for PC start with one decision: which branch you are actually playing. Once that is clear, the tuning path gets much easier. Ray tracing, grass, shadows, population, and distance all matter, but not in the same order on both versions.
Jump To The Sections That Matter Most
Why GTA 5 Settings Matter On PC Frame Time, Clarity, And Shadow Cost
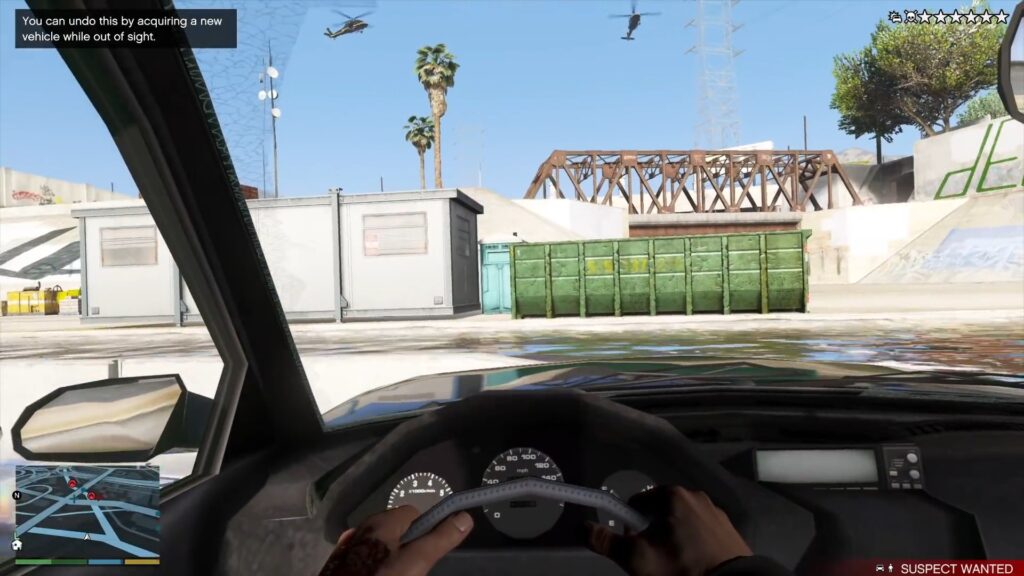
GTA 5 is old enough that people underestimate it, but Los Santos still stresses a PC in ways that simple corridor shooters do not. You have long sightlines, dense traffic, dozens of shadow casters, reflective vehicles, bright night lighting, and large rural areas where foliage density changes the whole performance picture. A setup that feels smooth downtown at noon can stumble hard in a rainy night chase or while cutting across Blaine County.
That is why the best GTA 5 settings for PC are not about average FPS alone. They are about stable frame time, clean movement, and visual clarity while the game is in motion. If your frame pacing keeps wobbling, the game can still feel bad even when the headline FPS looks fine, which is the same reason broader performance guides focus on 1% lows when trying to fix FPS drops on PC.
Shadows matter more than people think here, too. In GTA 5 they do not exist in a vacuum. Shadow cost climbs with grass, traffic, reflections, time of day, and the simple fact that the city throws far more moving objects into the scene than a quiet road in the desert. That is why good tuning feels focused. You are trying to remove the expensive clutter without flattening the entire image.
GTAV Enhanced Vs GTAV Legacy The First Choice You Need To Make
Rockstar now ships two distinct PC branches. GTAV Enhanced adds ray traced shadows, reflections, ambient occlusion, and global illumination, plus support for DLSS, FSR, NVIDIA Reflex, higher frame rates, and modern APIs. GTAV Legacy remains the classic version, and it still makes sense on older hardware, unsupported systems, or for players who simply want the original 2015 PC branch.
What Changes Between The Two PC Versions
| PC Version | Best For | Main Graphics Story | Recommended Starting Point | Do Not Start Here |
|---|---|---|---|---|
| GTAV Enhanced | Modern GPUs, modern storage, players who want the upgraded lighting path | Ray tracing, DLSS or FSR, NVIDIA Reflex, DirectX 12 or Vulkan, faster loading on SSD and DirectStorage-capable setups | Very High RT | Maximum RT as a blind default |
| GTAV Legacy | Older hardware, compatibility-minded players, anyone who prefers the classic DX11 branch | FXAA, MSAA, NVIDIA TXAA, Soft Shadows, PCSS or CHS, the old Advanced Graphics menu, Population and Distance tuning | DX11 + FXAA On | MSAA-heavy builds or maxed distance sliders |
That split changes how you optimize. Enhanced is best approached from the preset and ray tracing decision downward. Legacy is best approached from anti-aliasing, grass, shadows, population, and distance upward. If you mix those two approaches, you end up with bad GTA 5 graphics settings advice fast.
Best GTA 5 Settings Quick Answer Pick Your Branch, Then Your Goal
If you only want the short version before the deeper explainer, use the switchboard below. It is built around three real use cases for each PC branch: a balanced build, an FPS-first build, and the first settings to cut when you need quick performance back.
Very High RT
The best default for most modern mid-range and higher GPUs. It keeps the upgraded lighting path without paying the premium of Maximum RT.
Very High, RT Off
The smarter starting point for weaker GPUs, handhelds, or anyone who cares more about smoothness than the upgraded RT lighting stack.
Biggest Performance Saves
Do not nibble around the edges. Make the large cuts first, then polish the smaller legacy-style settings afterward.
DX11 With FXAA
This is the classic sane baseline. It avoids the expensive anti-aliasing traps and leaves room for better textures, shadows, and post-processing.
High Settings, No Waste
Legacy still looks good when you cut the obvious frame drains and keep the settings that matter most in motion.
Legacy Performance Killers
If GTA V Legacy starts running badly, these are the settings to question before almost anything else.
Best GTA 5 Enhanced Settings For PC Ray Tracing, Upscaling, And Real Performance
Enhanced is the branch that benefits from a preset-driven approach. The mistake most people make is treating it like Legacy and trying to outsmart every individual toggle from the start. In practice, the bigger win is choosing the right ray tracing path first, then trimming the shared quality settings only where they still matter.
Enhanced Quick Reference
Enhanced Settings That Actually Move The Needle
| Setting | Recommendation | Performance Logic |
|---|---|---|
| Graphics Preset | Very High RT | The best starting point for modern GPUs that want the upgraded lighting path without paying the Maximum RT premium. |
| Enable Ray Tracing | On if stable, Off if not | This is the main Enhanced performance fork. Make this decision first, not last. |
| Frame Scaling | DLSS / FSR Quality | The cleanest first step when native resolution is not holding your target frame rate. |
| Ray Traced Shadows | Very High | Stay aligned with the preset instead of aggressively splitting the RT stack into mismatched tiers. |
| Ray Traced Reflections | Very High | One of the headline visual upgrades, but not worth pushing to the heaviest possible preset by default. |
| Ray Traced Global Illumination | Very High | Part of what makes Enhanced actually look different. Keep it while the RT path remains viable. |
| Ray Traced Ambient Occlusion | Very High | Keep it with the rest of the RT stack rather than treating it like a tiny optional extra. |
| Ray Tracing Scene BVH Quality | Very High | Leave this alone unless you are benchmarking your own machine and need a last-resort RT trim. |
| Texture Quality | Very High If VRAM Allows | Worth protecting before you gut more obvious image-quality wins. |
| Grass Quality | High | Still one of the better places to save performance in open environments. |
| Distance Scaling | Middle | Good pop-in control without paying too much for distant detail you will rarely study in motion. |
| High Detail Streaming While Flying | On if you fly often | Worth it for aircraft-heavy play, lower priority otherwise. |
| Extended Distance Scaling | Low / Off | The first long-view slider to cut back when performance gets unstable. |
| In-Game Depth Of Field Effects | Off | Easy clarity win if you care more about readability than cinematic blur. |
| Motion Blur Strength | 0 | Simple visual cleanup with no downside for players chasing a cleaner image. |
Very High RT Is The Real Enhanced Starting Point
For the best GTA 5 Enhanced settings on PC, Very High RT is the smarter default than Maximum RT. Maximum RT can cost a lot more performance for surprisingly small real-world gains, and it is also more prone to looking noisier in motion. That makes it the wrong baseline for a guide that is supposed to help people play, not just admire screenshots.
Do Not Treat Maximum RT As The Default
Maximum RT is the kind of preset you test when you already know your GPU has spare headroom. It is not the setting you recommend to normal players first. Very High RT is where the upgraded look starts making sense without becoming wasteful.
Best Enhanced Display, Upscaling, And Latency Settings
Start with your monitor’s native resolution and DirectX 12. Keep the image native if your system already holds the frame rate you want. If it does not, use Frame Scaling with DLSS or FSR in Quality mode first. That is the cleanest step down. Move to Balanced only after Quality mode is still not enough.
NVIDIA Reflex is easy value when it is available. It does not make the game prettier, but it can make it feel snappier. V-Sync is still the usual tradeoff, so the normal baseline is off unless you are cleaning up tearing on a display without VRR.
If you do not know what frame rate target you should even be building for, use a practical definition of good FPS for gaming instead of copying somebody else’s number blindly.
Best Enhanced Ray Tracing Settings
If your GPU can run ray tracing well, keep the Enhanced RT path aligned around Very High. That means ray traced shadows, reflections, global illumination, and ambient occlusion all staying in the same general tier. The moment your performance stops being comfortable, make the big decision early: turn ray tracing off and move to the non-RT Very High path. That one change matters more than trying to save the RT build with ten smaller compromises.
The same logic applies to Ray Tracing Scene BVH Quality. Leave it at the preset baseline unless you are specifically benchmarking your own system. Enhanced still has far less per-setting public testing than Legacy, so the clean move is to use the stronger preset logic first and local testing second.
Best Enhanced Shared Quality Settings After The RT Choice
Once the ray tracing choice is done, the shared GTA 5 settings become much easier to manage. Texture Quality should sit at Very High if your VRAM allows it. Shader Quality is worth keeping high because lower settings flatten materials and lighting too aggressively. Anisotropic Filtering should stay at 16x because it is cheap and keeps road and ground textures cleaner at angles.
Grass Quality is still one of the big FPS levers, especially outside the city. High is the safe recommendation for a balanced build. Very High is fine if you have real headroom. Ultra is the kind of setting that sounds smaller than it is. Reflection Quality and Shadow Quality are the next two legacy-style levers worth trimming if you need more headroom after the RT decision.
Distance Scaling should live around the middle or a bit above it unless you are especially sensitive to pop-in. Extended Distance Scaling is still the slider to fear. It can quietly erase performance for a gain you mostly appreciate in slow comparisons, not while actually driving. Motion Blur Strength should be 0 for clarity, and In-Game Depth Of Field Effects is an easy cut if you care more about clean motion than cinematic blur.
Need More FPS In GTAV Enhanced?
- Drop from Maximum RT to Very High RT first, or go straight to Very High with ray tracing off if performance is already borderline.
- Use DLSS or FSR Quality, then Balanced only if Quality mode still is not enough.
- Lower Grass Quality before gutting textures.
- Trim Reflection Quality and Shadow Quality next.
- Reduce Distance Scaling slightly, then keep Extended Distance Scaling very low or off.
- Set Motion Blur Strength to 0 and disable In-Game Depth Of Field Effects if you want free clarity.
Best GTA 5 Legacy Settings For PC Classic Graphics, Shadows, And Performance
GTAV Legacy is easier to optimize because the biggest traps have been known for years. That does not mean the menu is simple. It still lets you waste performance fast if you pile expensive anti-aliasing, shadow extras, and long-distance sliders on top of each other. The fix is to respect the settings that actually move the needle and stop paying for the ones that barely survive motion.
Legacy Display And Graphics Baseline
| Setting | Recommendation | Why It Works |
|---|---|---|
| DirectX Version | DirectX 11 | Use the full classic feature set and avoid leaning on the old compatibility APIs as a fake optimization shortcut. |
| Resolution | Your monitor’s native resolution | Keep the output clean. Only drop below native when the hardware truly cannot hold your target. |
| FXAA | On | Cheap anti-aliasing baseline that is far easier to live with than heavy MSAA on most systems. |
| MSAA | Off | One of the oldest GTA V performance traps. Only use it if you knowingly have spare GPU and VRAM headroom. |
| NVIDIA TXAA | Off for most players | A Legacy-only NVIDIA path that only makes sense if you are already willing to pay the MSAA cost. |
| Texture Quality | Very High If VRAM Allows | Texture quality is usually worth protecting before you start sacrificing the more visible parts of the image. |
| Shader Quality | High | High preserves the look of lighting and surfaces well without insisting on the last small jump. |
| Reflection Quality | High | A strong middle ground in motion, especially compared with the costlier settings that sit nearby. |
| Reflection MSAA | Off | One of the easiest cuts in the whole game because the gain is tiny and the cost is real. |
| Water Quality | High | Looks good enough in normal play and leaves headroom for more important settings. |
| Particles Quality | High | Strong balance for explosions, fire, and smoke without pushing every effect to the limit. |
| Grass Quality | High | The smarter target for most systems. Very High and Ultra hit much harder than they look on paper. |
| Post FX | Very High | A good visual floor for bloom, glare, HDR-style lighting, and optional motion effects without going all the way to Ultra. |
| Anisotropic Filtering | 16x | Cheap clarity win. There is little reason to compromise here. |
| Tessellation | High | Good enough for a balanced build. It is a lower-priority conversation than grass, shadows, and distance. |
Best Legacy Display And Anti-Aliasing Settings
For the best GTA 5 Legacy settings on PC, start with DirectX 11, your monitor’s native resolution, FXAA On, and MSAA Off. That pairing does the most important thing first: it avoids sinking huge performance into anti-aliasing before the rest of the image is even balanced. TXAA only belongs in the conversation if you are on a supported GeForce card and already willing to pay the MSAA cost.
This is one of the biggest reasons older GTA 5 graphics settings lists age badly. They talk like all anti-aliasing paths are equally practical. They are not. MSAA is expensive enough to distort the rest of the build, which is why FXAA remains the sane default for most real-world Legacy setups.
Best Legacy Graphics Settings Beyond Anti-Aliasing
After anti-aliasing, the balanced Legacy build is straightforward. Keep Texture Quality at Very High if your VRAM allows it. Run Shader Quality at High, Reflection Quality at High, Water Quality at High, Particles Quality at High, and Anisotropic Filtering at 16x. That gives you a strong-looking game without dumping too much performance into side paths.
Post FX is worth keeping at Very High for a balanced build because dropping too low strips away too much of the atmosphere that makes GTA 5 nights and sunsets feel alive. At the same time, Reflection MSAA should stay off. It is the perfect example of a setting that sounds premium but rarely justifies itself during actual play.
The other major Legacy performance lever is Grass Quality. High is the smart default. Very High is a luxury. Ultra is where many systems start paying a lot more than the image improvement deserves, especially once you leave the city behind.
Grass Still Destroys Legacy FPS In Rural Areas
If GTA V Legacy runs fine in the city but falls apart in Blaine County, mountains, or grassy roadsides, do not blame textures first. Grass Quality is usually the first setting worth lowering.
Population, Distance, And Flying Settings In Legacy
Population Density around 75% is still the best middle ground. It keeps the city feeling busy without fully paying the cost of maximum traffic, pedestrians, extra shadows, extra reflections, and more headlights at night. Population Variety is more of a VRAM decision, so lower it before chopping away at stronger image-quality settings on memory-limited GPUs.
Distance Scaling should sit around the middle or a little above it. That keeps pop-in under control without turning every distant object into a performance bill. High Detail Streaming While Flying is worth enabling if you spend real time in aircraft. Extended Distance Scaling, however, is still the slider that can quietly destroy an otherwise sensible build.
Need More FPS In GTAV Legacy?
- Keep MSAA and Reflection MSAA off before changing almost anything else.
- Lower Grass Quality first when the countryside is the problem.
- Pull back Extended Distance Scaling before you cut core texture quality.
- Use Population Density around 75% instead of maxing it for no reason.
- Leave High Resolution Shadows off and Long Shadows off unless you are intentionally building a quality-first profile.
- Trim Post FX only after the obvious heavy hitters are already under control.
Best GTA 5 Shadow Settings For PC The Clean Split Between Enhanced And Legacy
If you are here specifically for GTA 5 shadow settings on PC, this is the short answer. Enhanced and Legacy do not want the same tuning strategy. Enhanced is controlled by the ray tracing decision first. Legacy is controlled by the old shadow stack first.
Shadow Tuning Cheat Sheet
Use The RT Path Or Leave It
The smartest shadow recommendation is Very High RT if your GPU can carry it. That keeps the upgraded shadow look without chasing the heavier Maximum RT path.
Shadow Quality High Is The Sweet Spot
Legacy rewards more traditional shadow tuning. Keep the base shadow quality strong, then avoid the expensive extras unless you have genuine headroom.
Make The Big Cut First
If Enhanced shadows feel too expensive, stop trying to rescue the full RT stack with tiny cuts. Switch to the non-RT path, then tune the rest of the build from there.
Do Not Stack Shadow Luxuries
High Resolution Shadows, Long Shadows, and high extended shadow distance can all look nice in isolation, but they are not where a balanced GTA 5 build should start.
Why Legacy Shadow Settings Need More Attention
Legacy layers multiple shadow settings on top of one another, which is why it is much easier to overspend here. A clean balanced path is Shadow Quality High, Soft Shadows Soft, High Resolution Shadows Off, Long Shadows Off, and Extended Shadow Distance kept low unless you still have room.
If you are on a GeForce card and intentionally building a prettier profile, PCSS is the premium contact-hardening option. On Radeon, CHS is the equivalent vendor-specific path. Both are luxuries, not defaults.
How To Tune GTA 5 Settings In The Right Order A Clean Setup Process
The fastest way to ruin a GTA 5 setup is to change ten settings at once and then guess which one helped. Use a simple order instead. That gets you to a stable build faster and makes troubleshooting much easier later.
Los Santos Tuning Order
Choose The Right PC Branch First
Make sure you are optimizing GTAV Enhanced or GTAV Legacy on purpose. The rest of the guide changes immediately based on that one decision.
Set Resolution And API Before Anything Else
Use your monitor’s native resolution. On Enhanced, start with DirectX 12. On Legacy, stay on DirectX 11.
Pick The Correct Baseline Preset Or AA Path
Enhanced should start from Very High RT or Very High with RT off. Legacy should start from FXAA On and MSAA Off.
Fix The Expensive Stuff First
Enhanced means the RT decision, then grass and distance. Legacy means MSAA, Reflection MSAA, grass, and Extended Distance Scaling.
Test In Three Real Scenarios
Do not trust only the benchmark. Drive at night in the city, hit a grassy rural area, and test flying if you care about aircraft pop-in.
Only Then Add Quality Back
Once the game is stable, start restoring the settings you actually notice. That is usually textures, shadows, and draw distance in that order.
Windows Tweaks For GTA 5 On PC Fix The Stuff Outside The Menu
Even perfect GTA 5 PC settings cannot fix a messy Windows environment. Overlay conflicts, background update tasks, browser tabs, recording tools, and borderline storage conditions can all turn a good in-game setup into a stuttery mess. Enhanced especially likes modern storage, so running it from an SSD with healthy free space is the obvious baseline.
The system-side cleanup is boring, but it works. Update your GPU driver, close overlays you do not need, keep the game on a fast SSD, and trim background load before you keep chasing one more in-game slider. If you want the broader pass, the deeper guides on how to optimize your PC for gaming and how to increase FPS on PC cover the system side better than any single-game guide ever will.
If you mostly play modded servers, stop assuming vanilla GTA V settings are the full story. FiveM changes the bottleneck so much that the dedicated guide to best FiveM graphics settings is the better reference for RP-heavy setups.
Troubleshooting GTA 5 PC Settings Quick Fixes That Actually Matter
Common Problems And The Right First Move
The Game Looks Blurry
Check the obvious things first: make sure the game is set to your monitor’s native resolution, do not over-aggressively use Frame Scaling, set Motion Blur Strength to 0, and disable In-Game Depth Of Field Effects if clarity matters more than filmic blur.
FPS Tanks In The Countryside
Lower Grass Quality before almost anything else. This is especially true on Legacy, but it still matters on Enhanced as well.
City Driving Stutters At Night
Reduce Population Density, Distance Scaling, and the expensive reflection or shadow settings before cutting textures. Night lighting multiplies the cost of a busy scene.
Enhanced RT Feels Too Heavy
Do not try to salvage Maximum RT forever. Move to Very High RT, or switch to Very High with ray tracing off and use DLSS or FSR Quality instead.
Flying Pop-In Looks Bad
Raise High Detail Streaming While Flying if flying matters to you, then tune Distance Scaling carefully. Do not jump straight to maxed Extended Distance Scaling.
Enhanced Crashes With Graphics API Errors
If you are running Vulkan and the game throws ERR_GFX_STATE style crashes, switch the Graphics API to DirectX 12, update the driver, and try again.
Conclusion
The best GTA 5 settings for PC depend on which branch you are actually running. For GTAV Enhanced, start at Very High RT if your GPU can handle it, then use DLSS or FSR Quality, keep Reflex on, set grass to High, and treat Extended Distance Scaling with caution. For weaker hardware, Very High with ray tracing off is the cleaner answer.
For GTAV Legacy, the classic winning formula is still DirectX 11, FXAA On, MSAA Off, Population Density around 75%, Grass High, Reflection MSAA Off, and Extended Distance Scaling kept low. Once you do that, the game stops fighting your hardware and starts looking like the version of Los Santos people actually remember.
Optimize Your Whole PC With Hone
If you want a cleaner, more consistent gaming experience without constant manual tweaking, Hone can help optimize performance across your system.
Try Hone FreeFAQ
What are the best GTA 5 settings for PC
It depends on the branch. For GTAV Enhanced, the best GTA 5 settings for PC usually start at Very High RT, your monitor’s native resolution, DLSS or FSR Quality if needed, Reflex On, Grass High, and Extended Distance Scaling kept low. For GTAV Legacy, start with DirectX 11, FXAA On, MSAA Off, Population Density around 75%, Grass High, Reflection MSAA Off, and Extended Distance Scaling low.
Should I use GTAV Enhanced or GTAV Legacy on PC
Use GTAV Enhanced if you have modern hardware and want ray tracing, DLSS or FSR, and the newer PC feature set. Use GTAV Legacy if your hardware is older, you want the classic DX11 branch, or the Enhanced version is simply too heavy for the system you are using.
What are the best GTA 5 shadow settings for PC
For GTAV Enhanced, the best shadow approach is Very High RT if your GPU can run it comfortably, or the non-RT Very High path if it cannot. For GTAV Legacy, a balanced shadow setup is Shadow Quality High, Soft Shadows Soft, High Resolution Shadows Off, Long Shadows Off, and Extended Shadow Distance kept low unless you still have spare performance.
Should I use MSAA or FXAA in GTA 5
In GTAV Legacy, FXAA is the better default for most players because it is much cheaper than MSAA. MSAA can still look good, but it is one of the more expensive settings in the old GTA 5 PC menu and can distort the whole balance of the build if your hardware is not strong enough.
Should I use ray tracing in GTA 5 Enhanced
Yes, if your GPU can run it without compromising smoothness. Very High RT is usually the best GTA 5 Enhanced starting point. If performance drops too hard, switch to the Very High non-RT path instead of trying to rescue Maximum RT with tiny individual cuts.
What setting hurts FPS the most in GTA 5
On GTAV Legacy, Grass Quality and Extended Distance Scaling are two of the biggest performance hitters, with MSAA also being a major cost. On GTAV Enhanced, the largest decision is whether ray tracing is enabled at all, especially if you are trying to run Maximum RT on mid-range hardware.
Why does GTA 5 stutter even when the FPS looks high
Because GTA 5 can suffer from unstable frame time even when the average FPS looks healthy. Busy night scenes, high traffic, reflections, shadows, grass, background apps, overlays, or poor storage conditions can all cause stutter without destroying the headline FPS number.
What is the best Graphics API for GTA 5 Enhanced
DirectX 12 is the safest starting point for most GTAV Enhanced players. If you are already on Vulkan and the game runs perfectly, that is fine, but DirectX 12 is the cleaner baseline and the better first fallback if graphics API errors appear.