


The best Halo: Campaign Evolved PC settings start with the Low preset, native output resolution, and the right upscaler for your GPU. This launch-window baseline prioritizes smooth combat and clear motion without pretending every PC will hit the same frame rate.
As of July 24 Early Access, keep Frame Generation and Motion Blur disabled, lower Global Illumination and Lighting first, and test Async Compute both ways. Patches, drivers, hardware, and mission load can all change the result.
Quick setup
Best Halo: Campaign Evolved PC settings
Start here, repeat one demanding route, and adjust one setting at a time. This launch-build setup favors stable rendered performance and clear motion; it does not promise a specific FPS.
Quick terms: DLSS, FSR, XeSS, and TSR reconstruct an image from a lower internal resolution; Frame Generation inserts extra displayed frames rather than fully rendering them; VRR means variable refresh rate; Async Compute lets GPU graphics and compute work overlap; and Reflex, Anti-Lag, and XeLL are vendor low-latency technologies.
| Exact menu label | Starting value | Why or caveat |
|---|---|---|
Select Monitor | Your gaming display | Setup only; not an FPS lever. |
Borderless Fullscreen | Enabled | No measured gain is implied. |
Display Resolution | Native monitor resolution | Use upscaling before lowering output resolution. |
Resolution Scale | 100% | Change it only for the TSR route. |
Minimum Frame Rate | None | With TSR, set only an achievable target after testing. |
Frame Rate Limit | None, then one sustainable cap | Use one limiter, not stacked caps. |
VSync | Off with working VRR | Without VRR, enable it if tearing matters more than delay. |
Quality Preset | Low | Raise only after the heavy route stays above target. |
Effects Quality | Low | Raise later if explosion-heavy fights remain smooth. |
Geometric Quality | Low | Raise later if detail matters and headroom is proven. |
Global Illumination Quality | Low | First individual quality control to reduce. |
Lighting Quality | Low | Lower with Global Illumination. |
Texture Quality | Low | Raise only after route testing and within video-memory capacity. |
Reflections | Low | Secondary lever; there is no verified separate ray-tracing switch. |
Atmospheric Quality | Low | Conservative start for outdoor and fog-heavy scenes. |
Post-Processing Quality | Low | Does not imply separate film-grain or chromatic-aberration controls. |
Upscaling Technique | DLSS / FSR / XeSS / TSR | Match the GPU vendor; use TSR as the universal fallback. |
Upscaling Quality | Ultra if native misses target | Otherwise use Native; compare clarity in motion. |
Async Compute | Enable, then A/B test | Keep whichever result is smoother or faster on the same route. |
Low Latency Mode | Vendor Specific when shown | Otherwise keep the game-selected default. |
Frame Generation | Disabled | Establish stable base, fully rendered performance first. |
Motion Blur | Disabled | Clarity and comfort choice, not a promised FPS gain. |
Screen Shake | Disabled for comfort | Enable it if you prefer stronger weapon feedback. |
Field of View | Default, then adjust for comfort | Wider views can cost performance. |
Mouse Smoothing | Disabled for mouse users | Irrelevant to controller input. |
Important: For non-TSR upscalers, Ultra is the quality-like 67% render mode—not “Ultra Performance.” TSR instead uses Resolution Scale and Minimum Frame Rate.
Do not let the name fool you: for DLSS, FSR, and XeSS, Upscaling Quality: Ultra renders at 67% and acts like the quality-focused mode. Native is 100%, while Low is only 33% and can look very soft.
What to lower first for more FPS
Start with Global Illumination Quality. The official PC optimization guide identifies it as a resource-intensive control, and it is the cleanest first test when the GPU cannot hold your target. Drop it to Low, replay the same outdoor fight, and watch both the counter and how the game feels during camera turns.
Next, set Lighting Quality to Low. Lighting and global illumination often become more demanding when a scene mixes open terrain, effects, enemies, and changing light. Keep them low even in the Image Clarity profile until the heavy route proves you have room to raise them.
If that is not enough, use upscaling before lowering Display Resolution. Keep the monitor output native and select DLSS on RTX, FSR on Radeon, or XeSS on Intel Arc when the option is available. Begin at Ultra. Move to High, which renders at 59%, only when extra speed matters more than the added softness.
The whole Quality Preset is the next big lever. In PC Gamer’s four-rig launch matrix at 1440p native, Ultra was roughly a quarter to nearly a third slower in average FPS than Low. That was whole-preset testing, not proof of a percentage gain from any single slider. The sampled visual gap was modest, not invisible: foliage, shadows, and lighting can still separate the presets in different scenes.
Use Effects Quality as a combat check. Explosions, plasma, smoke, and busy firefights are more useful than an empty corridor for deciding whether Medium is safe. Raise it only after those moments remain comfortably above your chosen target.
Leave Texture Quality alone unless longer traversal produces repeatable streaming symptoms or your graphics card is running out of capacity. VRAM means video memory used by the GPU for textures and other graphics data. Allocated memory is not the same as active use, so a large allocation alone does not prove textures caused a hitch.
Treat Geometric Quality, Reflections, Atmospheric Quality, and Post-Processing Quality as secondary adjustments. Lower one, repeat the route, and keep the change only if it helps. There is no verified separate ray-tracing switch, and Low Post-Processing does not guarantee removal of forced grain or chromatic effects.
Mission profiles
Pick a starting profile
Pick a starting profile, run the same fight, and keep a change only when the repeat run improves.
| Profile | Preset | Upscaling | Quality | Frame Generation | Use case |
|---|---|---|---|---|---|
| Balanced | Low | Vendor path | Ultra | Off | General start when native output misses target. |
| FPS First | Low | Vendor path | High | Off | Aggressive rendering; inspect softness in motion. |
| Image Clarity | Medium | Vendor path | Native | Off | For a heavy route that already meets target. |
Balanced
Best general start when native output misses your target.
- Preset
Low- Upscaling
- Vendor path
- Quality
Ultra- Frame Generation
- Off
FPS First
More aggressive rendering; check for softness during motion.
- Preset
Low- Upscaling
- Vendor path
- Quality
High- Frame Generation
- Off
Image Clarity
Use only when the heaviest repeatable route meets target.
- Preset
Medium- Upscaling
- Vendor path
- Quality
Native- Frame Generation
- Off
Every profile keeps Global Illumination Quality: Low, Lighting Quality: Low, Motion Blur: Off, and the same Async Compute A/B test.
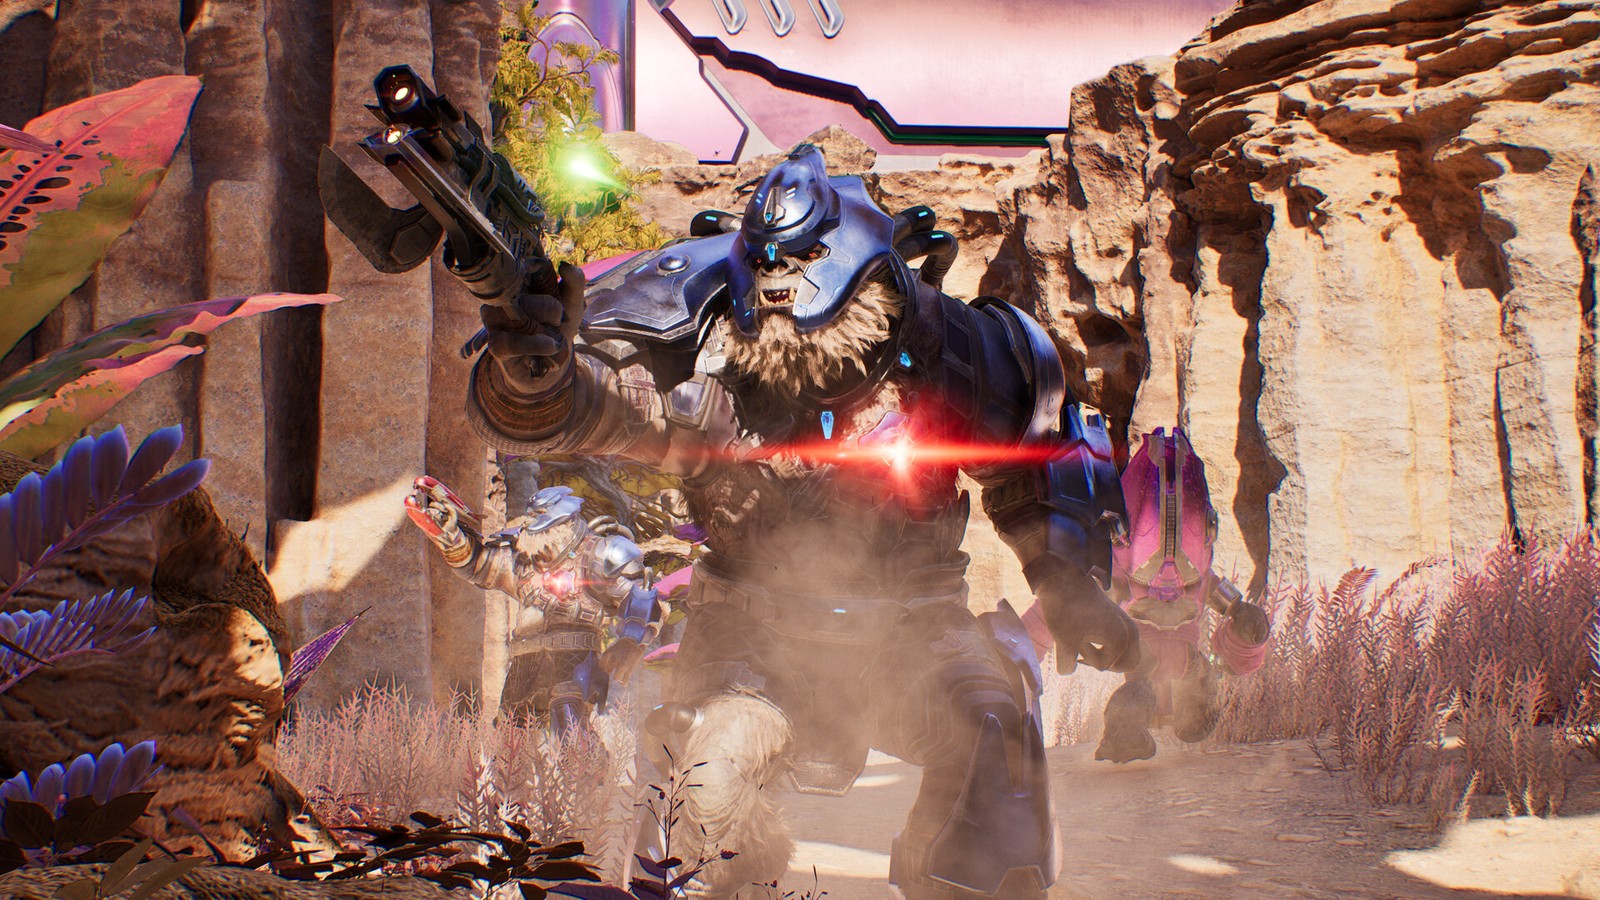
Balanced is the default route when native rendering misses the target. FPS First trades more internal resolution for speed, so inspect weapon edges, particles, foliage, and distant detail while moving. Image Clarity is for systems that already handle the hardest repeatable scene; it is not a promise that Medium and Native will hold a particular number.
DLSS vs FSR vs XeSS vs TSR
Choose the vendor path your GPU is built to use: DLSS for Nvidia RTX, FSR for AMD Radeon, and XeSS for Intel Arc when shown. TSR is the universal fallback. Compare them in motion on your machine because reconstruction quality can change with resolution, effects, and hardware.
The quality names are unusual. For non-TSR upscalers, Native is 100%, Ultra is 67%, High is 59%, Medium is 50%, and Low is 33%. Ultra is therefore the quality-like starting mode—not “Ultra Performance,” and not a menu value called “DLSS Quality.”
Avoid Low unless the other choices cannot reach an acceptable result. Its 33% render resolution can make the image visibly soft, and the Early Access build also lists a configuration-specific visual issue when DLSS Low is paired with Low graphics. High is the more sensible aggressive profile, while Ultra should be the first upscaled test.
TSR takes a separate route. Upscaling Quality does not control its output-resolution behavior. Keep Display Resolution native, adjust Resolution Scale, and use Minimum Frame Rate only for an achievable dynamic-resolution target you have tested. Changing Upscaling Quality and seeing no TSR response does not mean TSR is broken.
XeSS availability can differ by storefront and patch, so use the options displayed by the current build rather than assuming every version matches. If the expected option is missing, check the current Halo Support notes before forcing a different driver or config route.
Frame Generation, latency, FPS caps, VSync, and VRR
Base or rendered FPS counts frames the game fully renders. Frame Generation inserts additional display frames between them, which can make motion look smoother but does not make the simulation or input equally responsive. That displayed number must not be read as native performance.
Keep Frame Generation off while building the baseline. First make aiming, camera movement, and combat feel stable at the rendered frame rate. Once that foundation is good, Frame Generation can be an optional smoothness layer, with the tradeoffs of added latency and possible visual artifacts. For more context, see how frame generation affects latency.
Low Latency Mode should stay at Vendor Specific when that value appears. The game selects the matching Reflex, Anti-Lag, or XeLL path. Do not stack driver overrides on top of it unless you are deliberately testing one controlled change.
Run the first test with Frame Rate Limit: None so you can see the route’s range. Then choose one sustainable cap based on the worst repeatable combat section—not a universal 60, 120, or 240 FPS rule. Use only one active limiter; stacked in-game, driver, and overlay caps make diagnosis harder.
VRR means variable refresh rate, where the display adapts its refresh to the game’s output. With working VRR, begin with VSync disabled. Without VRR, enable VSync if tearing bothers you more than its added delay. Neither choice is universally correct, and the temporary VRR-off cinematic test later in this guide is not a general gameplay recommendation.
Finally, A/B test Async Compute in the exact same route. Start enabled because GPU-bound systems may benefit, but CPU-bound systems can perform slightly worse. Keep the result that produces the steadier, faster run instead of treating either checkbox state as mandatory.
Official PC targets and the handheld route
The official PC specification rows are compatibility and target context, not a guarantee for every mission. They do not reveal the exact scene, low-frame behavior, upscaler state, or full option mix behind each target. Match your resolution to the appropriate tier, then validate it in the campaign rather than treating the hardware name as a result.
| Tier | Official target | CPU | GPU | Memory |
|---|---|---|---|---|
| Low | 1080p / 60 FPS | Ryzen 5 3600 / Core i7-10700K | RTX 2060 Super / RX 6600 / Arc A580 | 16 GB RAM / 8 GB VRAM |
| Medium | 1440p / 60 FPS | Ryzen 7 5700X / Core i5-12600K | RTX 3070 / RX 7600 XT | 16 GB RAM / 8 GB VRAM |
| High | 4K / 60 FPS | Ryzen 7 7700 / Core i7-12700K | RTX 3080 Ti / RX 9070 | 32 GB RAM / 12 GB VRAM |
| Ultra | 4K / 60 FPS | Ryzen 9 7900X / Core i9-13900K | RTX 4080 | 32 GB RAM / 16 GB VRAM |
All four tiers call for Windows 10 22H2 or Windows 11 and a 100 GB SSD. Treat the listed resolution and frame rate as the chart’s stated target—not a promise about the heaviest encounter, frame-time consistency, or an exact custom settings mix.
1080p, 1440p, and 4K starting points
At 1080p, test native resolution first. Upscaling has fewer source pixels to reconstruct at lower output resolutions, so the jump from Ultra to High or Low can be easier to notice. If native misses the target, try Ultra and judge fine geometry and motion before cutting further.
At 1440p, use the Low baseline and the vendor upscaler at Ultra when needed. This matches the resolution context behind the available four-rig Low-versus-Ultra preset comparison, but it still does not reproduce that test’s route, build, driver, or repetitions on your PC.
At 4K, internal rendering resolution becomes a major lever. Start with native output plus Ultra upscaling before lowering the display itself. Keep Global Illumination and Lighting at Low, and do not assume an official 4K hardware row guarantees Ultra settings or a fixed frame rate in every battle.
8 GB VRAM and handhelds
On an 8 GB graphics card, the conservative Texture Quality value is Low. Raise it only after repeated traversal and effects-heavy combat stay clean. A capacity number by itself cannot establish the right texture value because output resolution, the rest of the settings, mission data, and background GPU use all matter.
Handhelds and some below-minimum PCs may expose Very Low while hiding High and Ultra. Use Very Low only when the game actually shows it. PC Gamer’s Asus ROG Xbox Ally X launch test used Very Low with FSR Medium as a workable starting route, but that is one-device evidence—not Steam Deck verification or a handheld guarantee.
Below-minimum PCs are not officially guaranteed to be compatible or fully functional. If the baseline still cannot produce an acceptable experience, avoid unsafe config packs and hidden switches. Lower the supported controls, use a sustainable cap, and decide whether the current build is practical on that hardware.
Early Access issues — recheck after patches
These configuration-specific issues were listed for the July 23 launch build; not every player will encounter them. Check the current official release notes before changing drivers.
Refresh rate not divisible by 30
Issue: Cinematic stutter can occur.
Try: 60/120/240 Hz, TV Game Mode, or VRR Off temporarily as a cinematic diagnostic.
Steam build launched by direct EXE
Issue: Missing Steam connection, severe performance, or a freeze.
Try: Launch from the Steam library, not HaloCampaignEvolved.exe.
AMD 26.6.2/26.6.4, FSR, skipped Maw intro
Issue: A crash is likely in this combination.
Try: Follow current official driver guidance; watch the intro or change upscaler while diagnosing.
AMD, high refresh, VSync, 30 FPS cap
Issue: A crash can occur.
Try: Raise the cap or disable VSync only for this affected configuration.
DLSS Low with Low graphics
Issue: Grain, haze, or oversized lens flares can appear.
Try: Use Ultra or a less aggressive quality mode when performance allows.
RTX 5000, Keyes/The Maw, affected drivers
Issue: Driver versions 610.47/610.62/610.74 carry crash risk.
Try: Use 610.82 or the official rollback path in current notes.
XeSS Frame Generation with in-game cap
Issue: The game may visually freeze with occasional frame updates.
Try: Disable XeSS Frame Generation or remove the in-game cap while diagnosing.
XeSS upscaling and Frame Generation cinematics
Issue: Graphical issues and capped cinematic performance can occur.
Try: Disable Frame Generation for the baseline or use another supported path.
Pausing and resuming during cinematics can also desynchronize audio and video and briefly freeze playback.
Three-run field test
Prove each change on the same route
No verified built-in benchmark is documented, so use one repeatable outdoor or explosion-heavy fight. Uneven frame times—how long individual frames take to render—can feel stuttery even when average FPS looks acceptable.
Repeat each run under the same conditions. A first pass can include shader or asset warm-up, while a hitch at the same boundary on every pass may be route or event work rather than a simple graphics load. If you want a deeper explanation, read why games can stutter even at a high average FPS.
Change only one variable on the final run: the upscaling level, Async Compute state, or one sustainable cap. If you change the preset, upscaler, cap, and driver together, you will not know which adjustment helped—or which one damaged clarity or latency.
Do not use old Halo CE fixes
Halo: Campaign Evolved is not old Halo: Combat Evolved or Halo Custom Edition. Do not copy HAC2, OpenSauce, Chimera, old config.txt GPU IDs, buffering flags, forced anti-aliasing, EAX audio wrappers, or legacy executable arguments into this game.
Skip “FPS packs,” booster bundles, executable mirrors, registry scripts, forced Realtime priority, CPU-affinity masks, disabled security mitigations, and pagefile or service tweaks. They are not evidence-based Campaign Evolved settings and can create new instability. Routine shader-cache deletion is not maintenance either; rebuilding the cache can recreate compilation stutter and should remain a corruption diagnostic.
Start Low, then earn back quality
Begin with Low, keep Global Illumination and Lighting low, select the correct vendor upscaler, and use Ultra when native rendering misses your target. Test the same demanding route, change one option at a time, and raise quality only when the worst mission can hold it.
Once the in-game profile is stable, Hone’s guide to increasing FPS on PC covers the system side without turning generic tweaks into Halo benchmark claims.
Halo: Campaign Evolved PC settings FAQ
What are the best Halo: Campaign Evolved PC settings for FPS?
Start with the Low preset, Global Illumination Quality and Lighting Quality on Low, and your GPU’s vendor upscaler at Ultra when native rendering misses the target. Keep Motion Blur and Frame Generation off for the baseline, then test one repeatable combat route. These are launch-build starting values, not a guaranteed frame rate for every PC or mission.
Should I use DLSS, FSR, XeSS, or TSR in Halo: Campaign Evolved?
Use DLSS on RTX, FSR on Radeon, or XeSS on Intel Arc when available; TSR is the universal fallback. For non-TSR options, Ultra is the quality-like 67% render mode. TSR instead uses Resolution Scale and an achievable Minimum Frame Rate target. XeSS availability can remain storefront- and patch-sensitive, so follow the current options shown in-game.
Should I enable Frame Generation in Halo: Campaign Evolved?
Enable Frame Generation only after base rendered performance already feels stable and responsive. It can make displayed motion look smoother, but generated frames do not raise native responsiveness and may add latency or artifacts. Keep it off while testing. The Early Access build also has configuration-specific XeSS Frame Generation issues, so recheck current Halo release notes before enabling that path.
How do I fix cinematic stutter in Halo: Campaign Evolved?
For the documented Early Access cinematic issue, try a refresh rate divisible by 30, such as 60, 120, or 240 Hz. On a TV, test Game Mode; if needed, temporarily disable VRR as a cinematic diagnostic. Do not treat VRR Off as universal gameplay advice, and check the latest official release notes because this workaround is patch-sensitive.




 Youtube