Note: This article reflects technical optimization best practices for PC download performance.
System Guide
Pick 100 Economy in Battlefield 6
Every point matters. Battlefield 6’s attachment system isn’t just customization, it’s a strategic economy that forces you to specialize. High-impact attachments cost more, preventing god-tier builds that dominate everything. Your 100-point budget defines your weapon’s identity.
Before we dive into specific loadouts, you need to understand the foundation of everything in Battlefield 6: the Pick 100 system. This isn’t like previous Battlefield games where you just slap on whatever attachments you’ve unlocked. Every single attachment has a point cost, and your total budget is 100 points per weapon.
This creates real trade-offs. Want a massive 200-round belt on your LMG? That costs 55 points, over half your budget. Slug rounds for your shotgun to turn it into a pocket sniper? 40 points. Even a basic suppressor runs 25-30 points. You cannot stack every beneficial attachment. You have to choose what matters most for your playstyle.
Specialization
Build for a specific role. Trying to do everything results in mediocrity.
Priority
Expensive attachments define your build. Spend big on what matters most.
Balance
Every strength comes with a weakness. No perfect builds exist.
Eliminate Lag in Battlefield 6
The best loadout is only half the battle. Hone delivers the other half, applying expert-tuned optimizations with one click to reduce lag and boost your FPS.
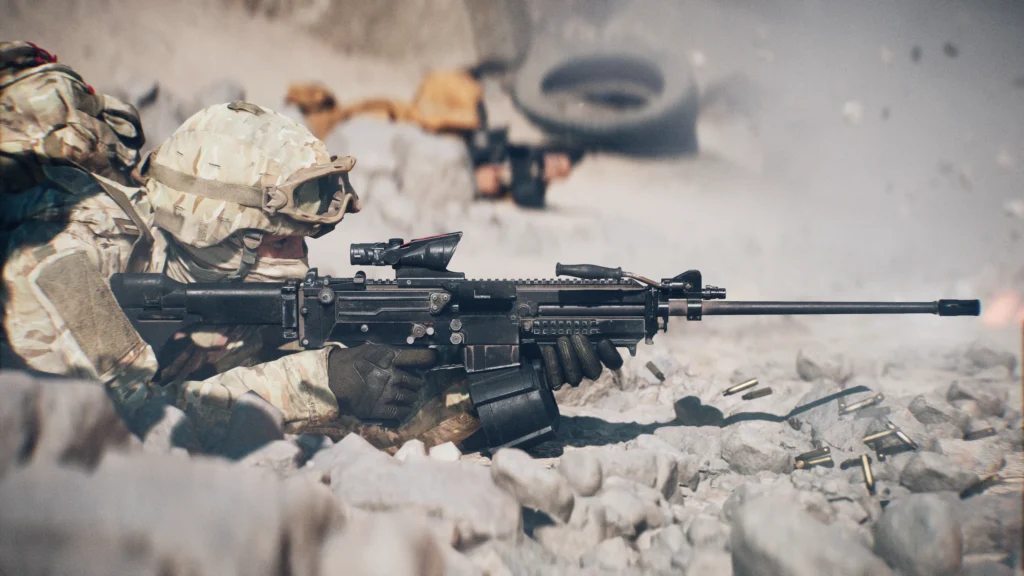
Assaults lead the charge and break defensive lines. Their unique ability to carry two primary weapons makes them the most versatile infantry class. Pair an AR with a shotgun and you’re lethal at every range.
The Assault class is built for one thing: taking objectives. Enhanced mobility reduces fall damage, faster objective interactions get you on the point quicker, and the Adrenaline Injector gives you a speed boost with explosive resistance when you need to push through heavy fire.
But the real power is Weapon Versatility. This lets you swap a gadget slot for a second primary weapon. Most classes have to build one gun that works at multiple ranges. You build two specialized weapons and carry both. This is huge for clearing buildings where you need a shotgun inside but an AR for the approach.
Training Paths
Choose Your Specialty
Breacher
Pure aggression. Extra grenades, faster launcher reloads, reduced movement penalties while firing. For players who blast through objectives.
OFFENSE
Frontliner
Survivability focus. Faster health regen, extra Adrenaline charges, squad members spawn with Adrenaline effect. For sustained pushes.
SUPPORT
Meta Build
Primary Weapon
NVO-228E
Class Path
Frontliner
Build Philosophy
This is the ultimate versatile assault rifle build. The NVO-228E hits hard with a three-shot kill potential, and we’re building it for maximum stability at mid-range. The Frontliner path gives you the survivability to stay on objectives longer, and the Deploy Beacon lets your squad spawn directly into the fight.
Attachment Breakdown100 Point Budget
Muzzle
Compensated Brake
30
pts
Barrel
409mm Fluted
25
pts
Underbarrel
Classic Vertical
20
pts
Magazine
40RND Magazine
15
pts
Ammunition
Polymer Case
5
pts
Scope
OSA-7 1.00x
5
pts
Total Investment
100/100 pts
Why This Works
The Compensated Brake and Classic Vertical grip combine for laser-like recoil control. You can hold the trigger and watch enemies drop at 30-50 meters. The 40-round mag lets you engage multiple targets without reloading. Polymer Case ammo improves your movement speed while ADS, making you harder to hit. This is a complete package.
+
Complete Loadout
Gadgets: Adrenaline Injector, Deploy Beacon Throwable: Frag Grenade Strategy: Use Deploy Beacon to establish forward spawns. Pop Adrenaline when pushing into contested objectives. The NVO handles everything from 10-50 meters.
Alternative Build
Dual Weapon Setup
M4A1 + M87A1 Shotgun
BREACHER
Primary: M4A1 Carbine
Use this for the approach and mid-range fighting. 900 RPM melts at close-mid range.
Fast TTKMobile
Secondary: M87A1 Shotgun
Switch to this when breaching buildings. One-shot kills at close range clear rooms instantly.
Room ClearerOHK Potential
Gadget Loadout
Primary: M320A1 HE Grenade Launcher Secondary: Flashbangs Throwable: Frag Grenade
Breach Protocol
1. Approach with M4A1
2. Launcher + Frag at entry
3. Flashbang interior
4. Switch to shotgun
5. Clear room by room
BF6 Engineer Class
E
Engineer
Anti-Vehicle Specialists
Engineers are the answer to enemy armor. Exclusive access to rocket launchers, repair tools, and anti-vehicle mines makes them essential on vehicle-heavy maps. Their SMG proficiency with improved hip-fire also makes them dangerous in close quarters.
Signature Weapon
SMGs
Key Ability
Repair Tool
The Engineer exists for one reason: to counter vehicles. In large-scale modes like Conquest where tanks and helicopters can dominate, a good Engineer is worth their weight in gold. You have access to every rocket launcher in the game, from lock-on fire-and-forget to high-damage unguided rockets.
But Engineers aren’t just about destruction. The Repair Tool is equally important for keeping friendly vehicles alive. A tank with an Engineer riding shotgun is exponentially more dangerous than one without. You can hop out mid-combat to repair critical damage, then get back in before the enemy can capitalize.
Path Comparison
Anti-Armor vs Combat Engineer
Anti-Armor
✓ Extra rockets
✓ 15% faster launcher reloads
✓ Damaged vehicles repair 50% slower
✓ Devastating against armor
Best For
Tank Hunting
VS
Combat Engineer
✓ Passive vehicle health regen
✓ Slower heat buildup on tools
✓ Permanent health buff to gadgets
✓ Sustains friendly armor
Best For
Vehicle Support
Eliminate Lag in Battlefield 6
You’re an Engineer, not an IT tech. Let Hone apply expert-tuned optimizations with one click to fix lag & boost FPS.
The PW7A2 is a laser beam with 947 RPM. Virtually zero recoil means you can challenge ARs at surprising ranges. Pair it with anti-vehicle tools to defend objectives against both infantry and armor. The improved hip-fire from Engineer class synergy makes you lethal in tight spaces.
Weapon Configuration
MUZZLE
Linear Compensator
15
UNDERBARREL
6H64 Vertical
25
MAGAZINE
40RND Magazine
20
AMMUNITION
Soft Point
20
LASER
5 MW Green
10
BARREL
180mm Standard
10
Budget Used100/100
Equipment
Primary Gadget: RPG-7V2
Secondary Gadget: Anti-Vehicle Mines
Throwable: Anti-Vehicle Grenade
Tactic
Mine approach routes. Use PW7A2 to hold building interior. When armor shows up, hit it with RPG + grenade combo.
BF6 Support Class
S
The Most Powerful Class
Support
In coordinated squad play, Support is arguably the strongest class in the game. You control the two most critical resources: health and ammunition. A squad with a good Support player can hold objectives indefinitely.
∞
Infinite Health
Supply Bag heals constantly
∞
Infinite Ammo
Resupplies weapons & gadgets
↑
Fast Revives
Faster than any other class
Support consolidates what used to be two separate classes (Medic and Ammo) into one powerhouse. This centralization makes you exponentially valuable. Lose an Assault and you lose one gun. Lose the Support and the entire squad loses sustain. That’s why in high-level play, the best strategy is often to protect and enable the Support player.
The Supply Bag is your defining tool. Drop it and everyone nearby gets healed and resupplied. It’s not just health kits or ammo packs, it’s both simultaneously. Combine this with LMGs that have massive magazines and no sprint penalty, and you become a mobile firebase that never runs out of bullets.
Training Path Decision
Combat Medic or Fire Support?
Combat Medic
KEY PERKS
• Drag downed teammates to safety
• Self-heal on revive completion
• 1.7 second revives (fastest)
• Increased healing range
BEST FOR
Squad players who prioritize team survival over kills
Fire Support
KEY PERKS
• Improved mounted weapon control
• 25% less explosive damage when prone
• Faster ammo resupply
• Better bipod stability
BEST FOR
Defensive LMG players who lock down sightlines
Meta Build: The Unkillable Medic
Weapon: M433 Assault Rifle
Survivability Specialist
COMBAT MEDIC
Philosophy
This build isn’t about getting kills. It’s about never dying and keeping your squad alive. The M433 is a balanced jack-of-all-trades AR that lets you focus on positioning and support. Deployable Cover creates safe revive spots. Smoke provides concealment. You’re the anchor that holds the objective.
Critical Loadout Components
1
Defibrillator
Mandatory. This is what makes you a Combat Medic. 1.7 second revives keep the squad in the fight.
2
Deployable Cover
Game-changer. Place this and you can revive teammates even under fire. Creates safe zones on objectives.
3
Smoke Grenades
Essential for safe revives in open areas. Block enemy sightlines and get teammates up.
Weapon Setup
Keep the M433 simple. Focus on reliability:
• Red dot sight
• Vertical grip
• Standard ammo
• Extended mag optional
Win Condition
Your squad never dies. They fight, go down, you revive them. Repeat. The enemy runs out of respawns. You don’t.
BF6 Recon Class
👁
Intelligence Warfare
Recon: More Than Sniping
Recon isn’t just about long-range headshots. You’re an intelligence force multiplier. Motion Sensors reveal enemy positions. Aim Spotting marks targets for your whole team. Recon Drones provide aerial reconnaissance. A skilled Recon controls information flow on the battlefield.
Signature Weapons
Sniper Rifles + DMRs
Unique Perk
Confirmed Kill (no revives)
Key Ability
Aim Spotting (auto-spot targets)
Synergy Bonus
Reduced scope sway, faster rechambering
The Recon’s true power is the Confirmed Kill perk from the Sniper path. When you get a headshot with a sniper rifle, that enemy cannot be revived. This is the only hard counter to Support players in the entire game. Every other kill can be instantly negated by a Combat Medic.
Your headshots are permanent deletions. Target enemy Supports and you cripple their entire squad’s sustain.
Meta Build
Sniper Build
M2010 ESR
SNIPER PATH
The ultimate overwatch setup. Optimized for extreme-range precision with stealth. Every headshot is a confirmed kill that can’t be revived.
Weapon Configuration
Lightened Suppressor30pts
26″ Carbon Barrel15pts
Bipod10pts
ADS DLC Bolt30pts
Match Grade Ammo10pts
5RND Magazine5pts
Total100/100
CRITICAL ATTACHMENT
ADS DLC Bolt (30pts)
Lets you chamber the next round while still looking through the scope. Essential for tracking targets and landing follow-up shots.
Full Equipment
Primary Gadget:
Laser Designator Mark vehicles for friendly lock-ons
Secondary Gadget:
Anti-Personnel Mines Protect your sniper nest
1. Find elevated overwatch position
2. Place mines on approach routes
3. Deploy bipod for stability
4. Prioritize enemy Supports
5. Use Laser Designator on armor
6. Relocate after 2-3 kills
Why Suppressor + ADS Bolt is Worth 60 Points
The Lightened Suppressor keeps you off the minimap. Enemies don’t know where the shots are coming from, so you can stay in one position longer. The ADS DLC Bolt is what separates good snipers from great ones. You never lose sight of your target between shots. These two attachments alone cost 60 points, but they define the entire build.
Reading the Battlefield 6 Zones
Pro Tip
There is no single “best loadout” in Battlefield 6. Mastery comes from having multiple specialized builds and knowing exactly when to deploy each one.
Conquest Meta
Large maps, vehicle-heavy, long sightlines
Prioritize:
• Long-range weapons (ARs, Snipers, DMRs)
• Anti-vehicle tools
• Deploy Beacons for flanking
• Vehicles and vehicle support
Breakthrough Meta
Linear objectives, tight chokepoints, high intensity
Prioritize:
• Smoke grenades for pushes
• Explosive gadgets for clearing
• Combat Medic for sustain
• Motion Sensors and area denial
Urban/CQB Maps
Tight corridors, buildings, short sightlines
Prioritize:
• SMGs and Shotguns
• Hip-fire attachments (lasers)
• Flashbangs and C4
• Motion Sensors for room clearing
Open/Long-Range Maps
Expansive terrain, 100m+ engagements
Prioritize:
• ARs with extended barrels
• Sniper Rifles and DMRs
• LMGs with bipods
• Bullet velocity attachments
Squad Composition
The Balanced Squad
Individual skill matters, but squad synergy wins matches. Here’s the composition that covers all bases:
1
Assault (Frontliner)
Leads pushes. Carries Deploy Beacon for forward spawns. Can run dual weapons for versatility.
ESSENTIAL
1
Engineer (Anti-Armor)
Counters enemy vehicles. Places mines on approach routes. Repairs friendly armor when needed.
ESSENTIAL
1
Support (Combat Medic)
THE MOST IMPORTANT PLAYER. Keeps everyone alive and supplied. Protect this player at all costs.
CRITICAL
1
Recon (Flexible)
Provides intelligence with Motion Sensors. Long-range Sniper OR aggressive DMR depending on map.
FLEXIBLE
Why This Works
This squad has an answer to everything. Vehicles? Engineer handles it. Infantry pushes? Assault breaks through and Support keeps everyone alive. Intelligence? Recon spots enemies and marks targets. The Support is the glue that holds it together – lose them and the squad falls apart. This is why “protect the Support player” is the golden rule in high-level play.
The Pick 100 system forces you to build for a specific role. Trying to be good at everything results in being mediocre at everything. Decide what your weapon needs to do, then spend your entire budget making it excel at that one thing.
2
Support is the Most Valuable Player
In coordinated squads, the Support player controls health, ammo, and revives. They’re the reason your squad can hold objectives indefinitely. Protect your Support at all costs. If they die, the squad falls apart within seconds.
3
Adapt to the Situation
There is no universal best loadout. The meta changes based on game mode, map type, and what the enemy is doing. Master players have 4-5 loadouts per class and switch between them mid-match as needed.
4
Expensive Attachments Define Builds
Attachments that cost 25-45 points are build-defining. Suppressors, high-end grips, special ammunition, these expensive choices shape your weapon’s identity. Spend big where it matters, save points everywhere else.
5
Squad Composition Wins Games
Individual skill matters, but a coordinated squad with proper class balance beats four solo players every time. Always ensure you have at least one Engineer and one Support. Everything else is negotiable.
Battlefield 6’s loadout system is deeper than any previous entry in the series. The Pick 100 attachment economy forces meaningful choices, the class system demands role specialization, and the variety of maps and modes requires constant adaptation. The players in Battlefield 6 who dominate aren’t necessarily the best shots, they’re the ones who understand the meta, build specialized loadouts for specific situations, and coordinate with their squad.
Start with the meta builds in this guide. Learn why they work. Then experiment with variations that match your playstyle. The best loadout is the one that fits how you want to play, not the one with the highest theoretical stats. Master the fundamentals, adapt to the battlefield, optimize your PC and you’ll be unstoppable.
FAQ
What is the Pick 100 system in Battlefield 6
The Pick 100 system gives every weapon a 100-point budget for attachments. Each attachment has a cost, so you can’t stack every upgrade. This forces trade-offs between control, stealth, and power, making every build a tactical choice instead of pure stat stacking.
Which class is the most powerful in Battlefield 6
Support is widely considered the strongest class in Battlefield 6. It combines the old Medic and Ammo roles, providing infinite health, ammo, and fast revives. A skilled Support can sustain an entire squad indefinitely, making them the backbone of team success.
What is the best Assault build in Battlefield 6
The top Assault build pairs the NVO-228E with the Frontliner path. Equip a Compensated Brake, 409mm Fluted Barrel, and Classic Vertical Grip for 100-point precision. Add the Adrenaline Injector and Deploy Beacon for aggressive frontline pushes with sustained squad spawns.
How should I build my Engineer class in Battlefield 6
Engineers excel with the PW7A2 SMG under the Anti-Armor path. Use a Vertical Grip, 40-round magazine, and Soft Point ammo. Equip RPG-7V2 and Anti-Vehicle Mines to counter armor. The setup allows you to defend objectives while maintaining mobility in close combat.
What makes the Recon class important in Battlefield 6
Recon provides critical battlefield intelligence. Using Motion Sensors, Aim Spotting, and Drones, Recon players mark enemy positions for the team. The Confirmed Kill perk prevents revives on headshots, making Recon a hard counter to Support-heavy squads.
What is the best squad composition in Battlefield 6
The most balanced squad is one Assault (Frontliner), one Engineer (Anti-Armor), one Support (Combat Medic), and one Recon. This setup provides offense, defense, sustain, and intelligence. It ensures your team can adapt to vehicles, infantry, and dynamic objectives.
Full Performance, No Cost
Kick off an exciting adventure for free! Just download the app, create your account, and enjoy up to 20 optimizations at no cost.