Your CPU is sandbagging. Right now, it’s running at speeds the manufacturer deemed “safe” for the lowest common denominator – but your specific chip might be capable of much more performance. That untapped potential is just sitting there, waiting.
Overclocking isn’t about breaking your hardware or chasing benchmark records, but about discovering what your specific silicon is truly capable of.
The Overclocking Trade-Off
Understanding what you gain and what you risk
Potential Risks
- Voided warranty on CPU
- Increased heat generation
- Higher power consumption
- Potential system instability
- Reduced lifespan (20→15 years)
Potential Rewards
- 5-10% performance boost
- Higher FPS in games
- Faster rendering times
- Extended hardware lifespan
- Free performance upgrade
What Is CPU Overclocking? (And Why Your Chip Is Holding Back)
CPU overclocking is the process of running your processor faster than its factory-specified speed. Think of it as removing the speed limiter on a car – the engine was always capable of more, but manufacturers set conservative limits for reliability across millions of units.
Your CPU operates on clock cycles measured in gigahertz (GHz). Each cycle represents an electrical pulse that triggers the processor to execute instructions. A 3.6 GHz CPU completes 3.6 billion cycles per second.
Overclocking increases this frequency, allowing more operations per second and directly translating to better performance.
Real-World Performance Gains from Overclocking
| Application | Typical Gain | Impact |
|---|---|---|
| Gaming (CPU-bound) | 5-15% FPS | Higher frame rates, reduced stuttering |
| Video Rendering | 10-25% faster | Hours saved on long projects |
| 3D Modeling | 5-15% faster | Smoother viewport performance |
| Code Compilation | 10-20% faster | Significant time savings for developers |
| General Desktop Use | 5-10% faster | Minimal noticeable difference |
Step 1: Check Your Hardware Compatibility

Not every system can be overclocked. Before diving into BIOS settings, you need to verify your hardware supports overclocking. This isn’t just about having the right CPU – your entire gaming PC must be capable.
AMD: All Ryzen CPUs
Check: CPU-Z or Task Manager
AMD: B450+, X470+
Avoid: H-series, A320
Better: 240mm+ AIO
Stock coolers: Not sufficient
Rating: 80+ Bronze minimum
Age: Under 5 years ideal
Cooling: Heatspreaders help
Stability: May need tuning
Stress: Prime95, OCCT
Benchmark: Cinebench R23
Step 2: Prepare Your System (Critical Safety Steps)
Preparation is the difference between a successful overclock and a corrupted Windows installation. These steps create a stable baseline and safety net before making any changes.
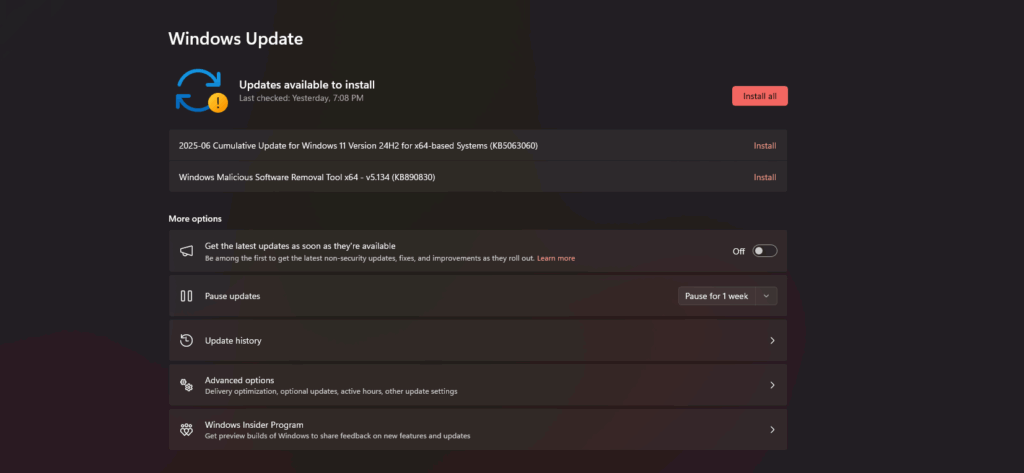
Update Everything
Outdated software causes mysterious crashes that you’ll wrongly blame on your overclock.
- Update motherboard BIOS to latest version
- Install latest chipset drivers
- Update Windows completely
- Get latest GPU drivers
Clean Your PC
Dust is an insulator. Clean components run 5-10°C cooler.
- Blow out all dust filters
- Clean CPU cooler fins
- Check thermal paste age (replace if 2+ years)
- Verify all fans spinning properly
Establish Baseline
You can’t measure improvement without knowing where you started.
- Run Cinebench R23 – record score
- Stress test 30 minutes – note max temp
- Document stock speeds and voltages
- Create system restore point
Step 3: Knowing Safe Temperature and Voltage Limits
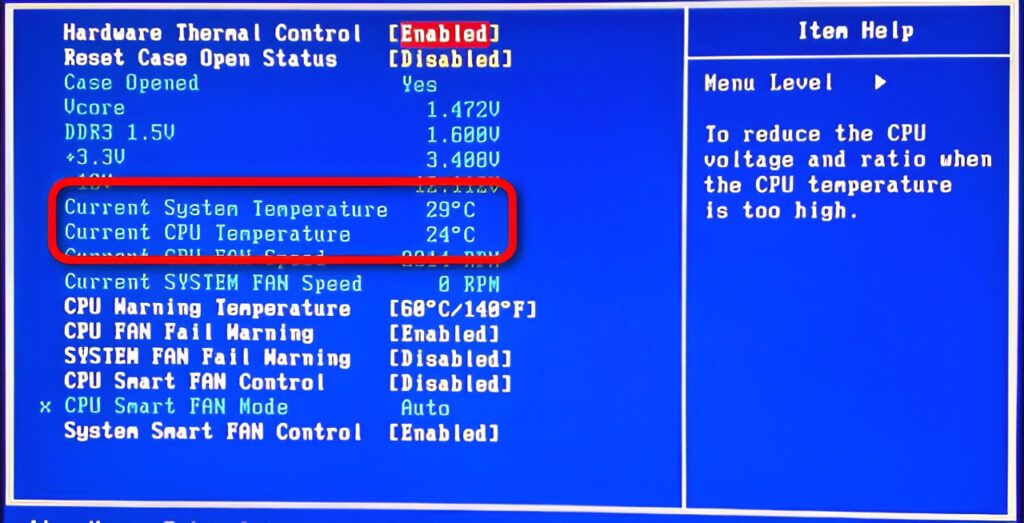
Temperature and voltage are the two factors that determine whether your overclock is sustainable or slowly killing your CPU. Understanding these limits is non-negotiable for safe overclocking.
CPU Temperature Zones
Modern CPUs throttle at 100°C but degradation accelerates above 80°C
Safe Voltage Guidelines by CPU Generation
| CPU Type | Safe Daily | Maximum | Avoid |
|---|---|---|---|
| Intel 12th-14th Gen | 1.35V | 1.42V | 1.50V+ |
| Intel 10th-11th Gen | 1.35V | 1.40V | 1.45V+ |
| AMD Ryzen 5000/7000 | 1.35V | 1.40V | 1.45V+ |
| AMD Ryzen 3000 | 1.325V | 1.375V | 1.40V+ |
Step 4: Your First Overclock (Beginner Method)

This conservative method prioritizes stability and safety. We’ll use multiplier-only adjustments, leaving more complex settings for later. Expect 5-10% performance gains with minimal risk.
BIOS Settings to Change
Enter BIOS
Restart and mash DEL or F2 during boot
- Find “OC Tweaker” or “Overclocking” section
- Disable any “Auto OC” features
- Set manual control mode
Increase Multiplier
Small steps prevent instability
- Increase by +2 (e.g., 40 to 42)
- Apply to all cores
- Save and exit (F10)
Test Stability
Every change needs validation
- Boot to Windows (fingers crossed)
- Run Cinebench – compare scores
- Stress test 15-30 minutes
- Monitor temps constantly
Step 5: Fine-Tuning with Voltage Control
Once you hit instability with multiplier-only overclocking, voltage adjustment unlocks further headroom. This is where real gains happen, but also where risk increases significantly.
Voltage Tuning Process
Finding Your Optimal Voltage
| Multiplier | Test Voltage | Result | Action |
|---|---|---|---|
| 45x (4.5 GHz) | 1.250V | Crash in 5 min | Increase voltage |
| 45x (4.5 GHz) | 1.275V | Crash in 20 min | Increase voltage |
| 45x (4.5 GHz) | 1.300V | Stable 1 hour | Test overnight |
| 46x (4.6 GHz) | 1.300V | Instant crash | Need more voltage or reduce frequency |
Step 6: Stress Testing and Validation
A stable Windows desktop means nothing. True stability requires passing multiple stress tests that push different CPU instructions and workloads. Skip this step and enjoy random crashes during important work.
Quick Validation
Catches obvious instability
- Cinebench R23 multi-core loop
- Monitor temps hit steady state
- Watch for throttling or crashes
- If stable, proceed to next test
Real Stress Test
Separates “looks stable” from actually stable
- Prime95 Small FFTs (maximum heat)
- OCCT Large Data Set (finds errors)
- Monitor for WHEA errors in HWiNFO
- Any errors = reduce clocks or add voltage
Overnight Validation
Final stability confirmation
- Prime95 Blend test overnight
- Tests CPU, cache, and memory
- Log temperatures throughout
- Wake up to success or error logs
Troubleshooting Common Overclocking Problems
Even experienced overclockers encounter issues. Most problems follow predictable patterns with established solutions. Here’s how to diagnose and fix the most common overclocking failures.
Overclocking Troubleshooting Flowchart
BSOD Codes and Solutions
| Error Code | Meaning | Solution |
|---|---|---|
| 0x101 | CLOCK_WATCHDOG_TIMEOUT | Increase CPU voltage |
| 0x124 | WHEA_UNCORRECTABLE_ERROR | Increase voltage or reduce frequency |
| 0x0A | IRQL_NOT_LESS_OR_EQUAL | Memory instability – check RAM OC |
| 0x3B | SYSTEM_SERVICE_EXCEPTION | Increase CPU voltage |
| 0x50 | PAGE_FAULT_IN_NONPAGED_AREA | RAM timing/voltage issue |
Advanced Techniques for Maximum Performance
Once you’ve mastered basic multiplier and voltage overclocking, these advanced techniques can squeeze out the last 5-10% of performance. They’re more complex but offer refined control.
Advanced Overclocking Options
Best Practices for Long-Term Stability
A successful overclock isn’t just about achieving high numbers – it’s about maintaining those speeds reliably for years. These practices ensure your overclock remains stable as your system ages.
Document Everything
Future you will thank present you
- Screenshot all BIOS settings
- Record stable voltages and frequencies
- Note ambient temps during testing
- Save stress test results
Regular Maintenance
Prevents degradation and instability
- Clean dust filters monthly
- Monitor temps seasonally
- Reapply thermal paste every 2-3 years
- Run stability test quarterly
Conservative Daily Settings
Maximum performance isn’t worth minimum lifespan
- Run 100-200MHz below maximum stable
- Use adaptive voltage when possible
- Enable C-states for idle efficiency
- Set reasonable temperature targets
The Bottom Line
CPU overclocking remains one of the last true hardware optimizations available to enthusiasts. While modern CPUs boost themselves remarkably well, manual overclocking still offers 5-10% performance gains for those willing to invest the time.
The key is approaching it methodically: verify hardware compatibility, prepare your system properly, start with conservative changes, test thoroughly, and prioritize stability over maximum speed. With proper cooling and reasonable voltages, a well-executed overclock can breathe new life into aging hardware or push new components beyond their advertised limits.
Remember: every CPU is different. What works for someone else’s chip might not work for yours. The journey of discovering your silicon’s limits is half the appeal. Take it slow, document everything, and enjoy the free performance upgrade.
Frequently Asked Questions
Will overclocking void my CPU warranty?
Yes, overclocking voids most manufacturer warranties. Intel and AMD can detect if a CPU has been overclocked through internal logs. However, they rarely check unless you explicitly mention overclocking when making a warranty claim. Some retailers offer extended warranties that cover overclocking.
How much does overclocking actually reduce CPU lifespan?
With reasonable voltages (under 1.4V) and temperatures (under 80°C), a CPU’s lifespan might reduce from 20 years to 15 years. Since most users upgrade every 5-7 years, this reduction is largely theoretical. Excessive voltage and heat cause exponentially faster degradation.
Can I overclock a laptop CPU?
Most laptop CPUs are locked and cannot be overclocked. Some high-end gaming laptops with HK-series Intel CPUs allow limited overclocking, but thermal constraints severely limit potential gains. Undervolting for better thermals is usually more beneficial than overclocking on laptops.
What’s the difference between all-core and per-core overclocking?
All-core overclocking sets every CPU core to the same frequency, simplifying the process. Per-core overclocking identifies your best cores and runs them faster than weaker cores, potentially achieving higher boost clocks for lightly-threaded workloads like gaming. It’s more complex but can yield 2-5% better performance.
Why does my overclock crash in games but pass stress tests?
Games use different CPU instructions than synthetic stress tests. They also stress the system differently with varying loads. Try increasing voltage slightly, testing with different stress tests (OCCT, Prime95 with various FFT sizes), or reducing your overclock by 100MHz for better real-world stability.
Should I use automatic overclocking features?
Automatic overclocking (motherboard “EZ OC” features) typically uses excessive voltage to ensure stability across all chips. This results in higher temperatures and power consumption for modest gains. Manual overclocking achieves better results with lower voltages but requires more time and testing.
What’s a safe 24/7 voltage for modern CPUs?
For Intel 12th-14th gen and AMD Ryzen 5000/7000: 1.35V is considered very safe, 1.40V is acceptable but not ideal, and anything above 1.45V risks accelerated degradation. These limits assume good cooling keeping temperatures under 80°C. Higher temperatures require lower voltages for equivalent safety.
How do I know if my PSU can handle overclocking?
A quality PSU with 100-150W headroom above your system’s stock power draw should suffice. More important than wattage is quality – a good 650W unit beats a cheap 850W unit. Look for 80+ Bronze minimum certification and reputable brands. Instability from insufficient power manifests as random reboots under load.
Is overclocking worth it with modern CPUs?
Modern CPUs boost themselves well, but manual overclocking still provides 5-10% gains for all-core workloads. It’s most valuable for extending older hardware’s lifespan, maximizing performance in CPU-bound scenarios, or simply enjoying the hobby. The gains are smaller than a decade ago but still meaningful for many use cases.
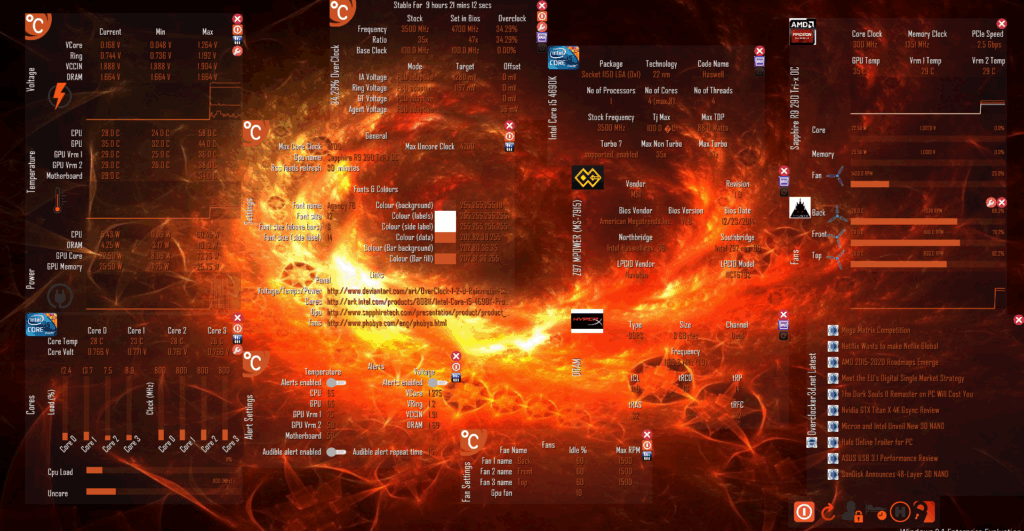
What tools do I need for overclocking?
Essential software: CPU-Z (verify speeds), HWiNFO64 (monitor everything), Prime95/OCCT (stress testing), Cinebench R23 (performance benchmark). For hardware: adequate CPU cooler (tower air or 240mm+ AIO), quality thermal paste, and case with good airflow. Total software cost: $0 – all tools are free.